Roaring Temple Dungeon Guide - Throne & Liberty
Welcome to our guide about the Roaring Temple dungeon in Throne & Liberty.
In this guide, we will help you to guide your group through Roaring Temple, explaining the mechanics of all bosses and the most dangerous mobs, and how to defeat them.
Roaring Temple (previously translated as Temple of Roar in older versions of Throne & Liberty) has a minimum level of 30 and is one of the more beginner-friendly dungeons in Throne & Liberty. It can be considered an easier version of the Temple of Slaughter. However, the final boss does require a decent amount of coordination in your group, so in a way, this can be considered a good dungeon for practising and honing your skills before attempting more difficult content.
To access the Roaring Temple, locate the dungeon in the Secret Dungeons section of the in-game menu (Esc or F10).
For more guides about a variety of topics in TL, please check our Throne & Liberty Guides Database.
Roaring Temple Mechanics & Strategy Guide
We will now guide you through each dungeon section, including all rooms, mobs and bosses.
First Rooms
The first part of the dungeon is very simple, there are a few rooms with some basic mobs that you need to clear out. They don’t have any special mechanics, so you just need to stick together with your team and DPS them down normally. After the first room, you will need to drop down to a lower level – the best way to do this is to glide down. Then there are a couple more rooms with more mobs.
After defeating the mobs in the third room, head to the northeast corner of the room and you will find a Mana Flood Regulator. Interact with this and part of the room will flood with water. The first boss will then appear.
Ancient Berserk Dark Enforcer Boss
The Ancient Berserk Dark Enforcer is a fairly simple boss, it is not likely to cause your party any real problems as long as you have a tank and a healer in your group.
This boss has only one mechanic; he will periodically fill the room with a fire AOE that applies Burning stacks to your party. You'll take a lot of damage if you get too many stacks of Burning. To mitigate this, you can jump into the water to cool your character down and reduce the Burning damage. Your group’s healer can also help to mitigate the damage from the Burning effect.
Keep on top of the Burning, and DPS the boss down normally in order to finish this fairly easy boss fight.

Burning Corridor
After finishing the first boss, you progress into a large burning corridor with multiple levels. The easiest way to progress through this area is to use your bird morph to glide to the other side. Make sure you avoid the flame pillars if you are using this method, otherwise you can get yourself into trouble.
Clear out the mobs in your way and then proceed to the next room, where you will find the second boss.
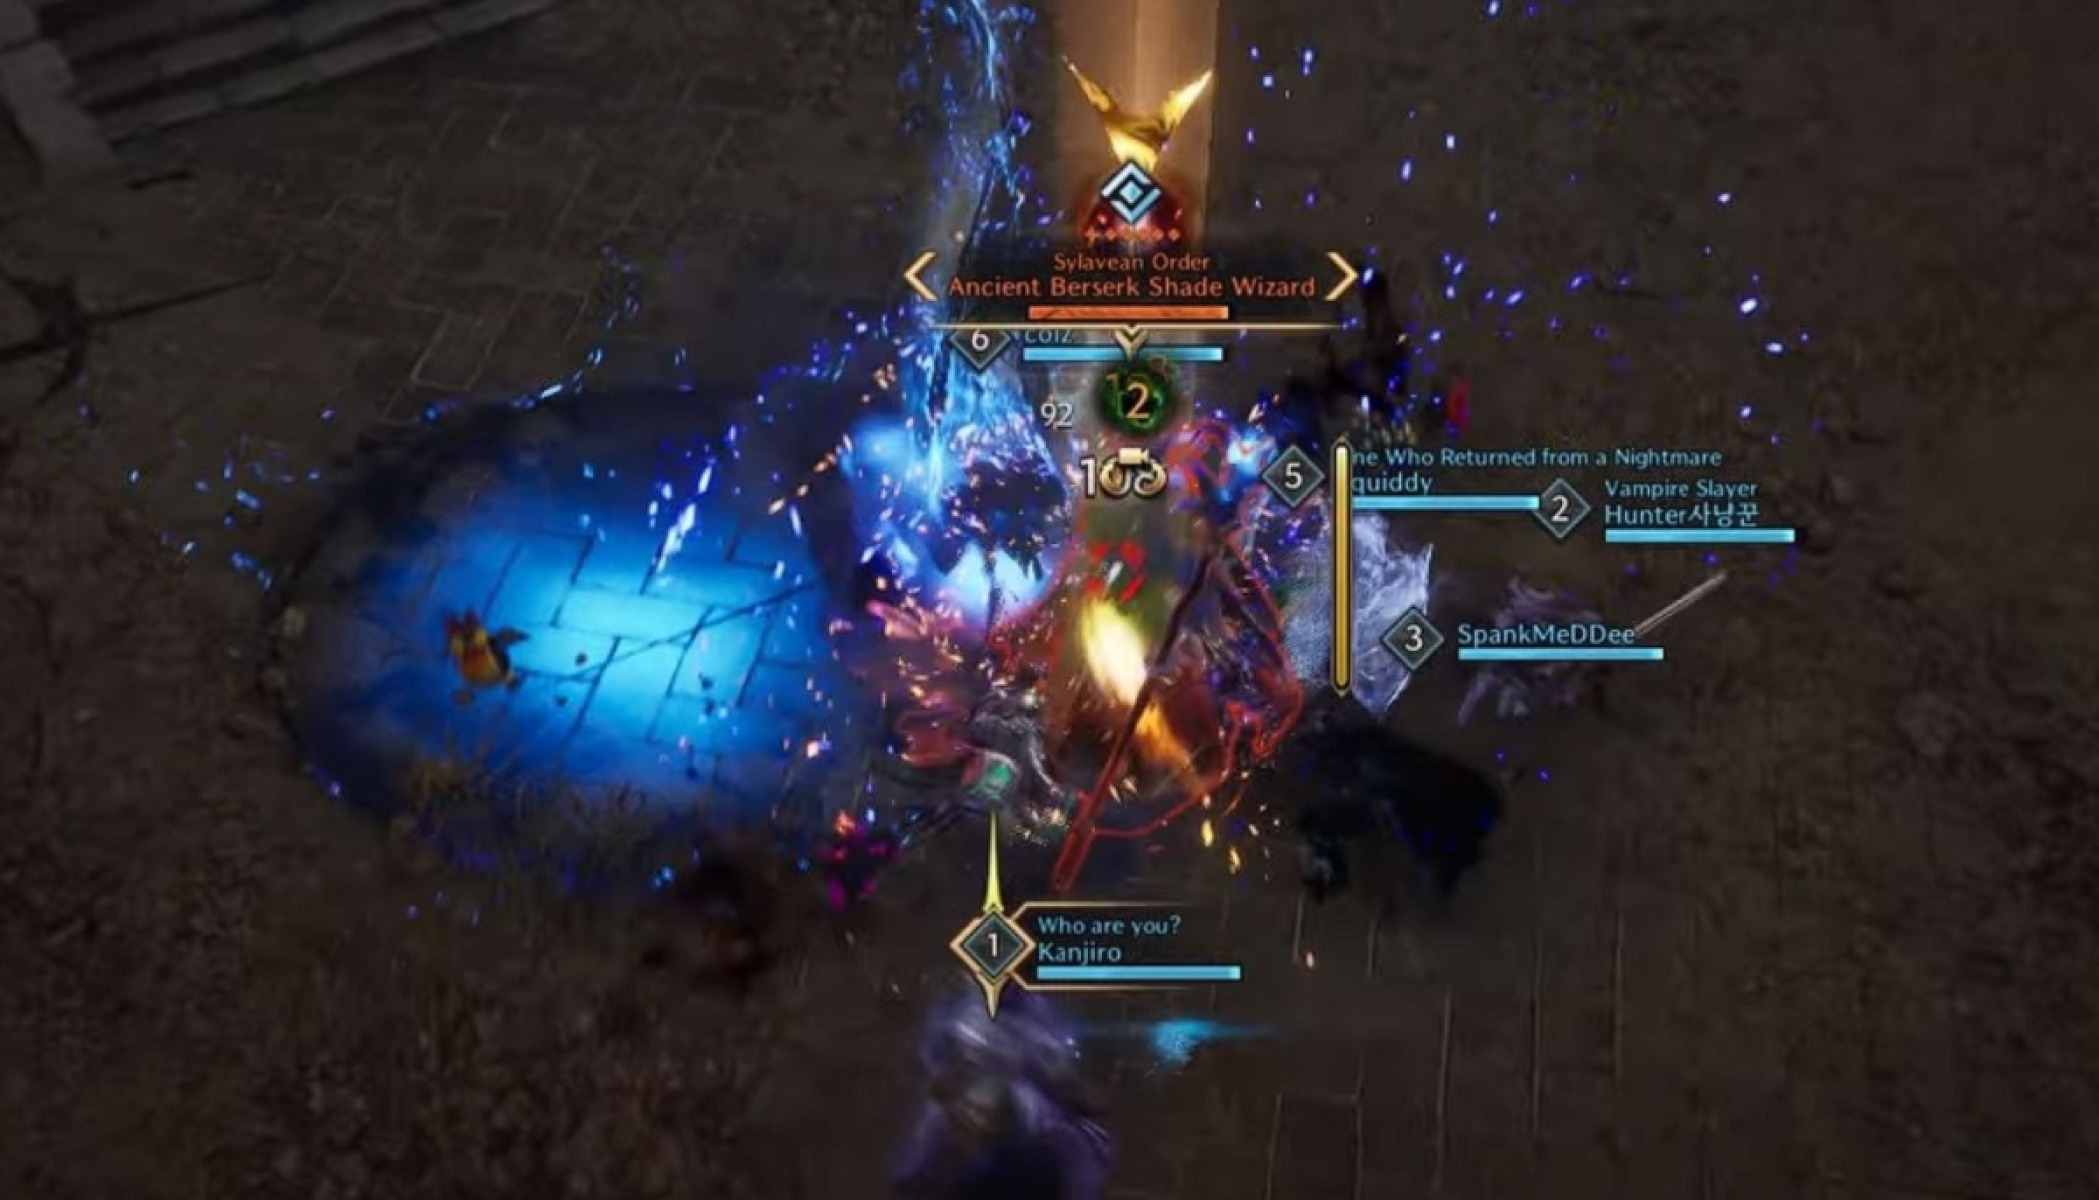
Ancient Berserk Shade Wizard
The Berserk Shade Wizard is tougher than the first boss, but still a relatively simple encounter. There are a couple of things you need to watch out for during this fight:
- Ground AOEs – AOEs will appear on the ground during this fight. These do quite a lot of damage, so make sure to avoid them as much as you can.
- Dogs – The boss will summon dogs throughout the fight. These dogs will chase after players and do a Fury Attack, which will fear you if you don't block it. The dogs will keep respawning, so it's not worth focusing any damage on them.
Once you have defeated the Berserk Shade Wizard, you can proceed into the final room to fight the last boss of the Roaring Temple.
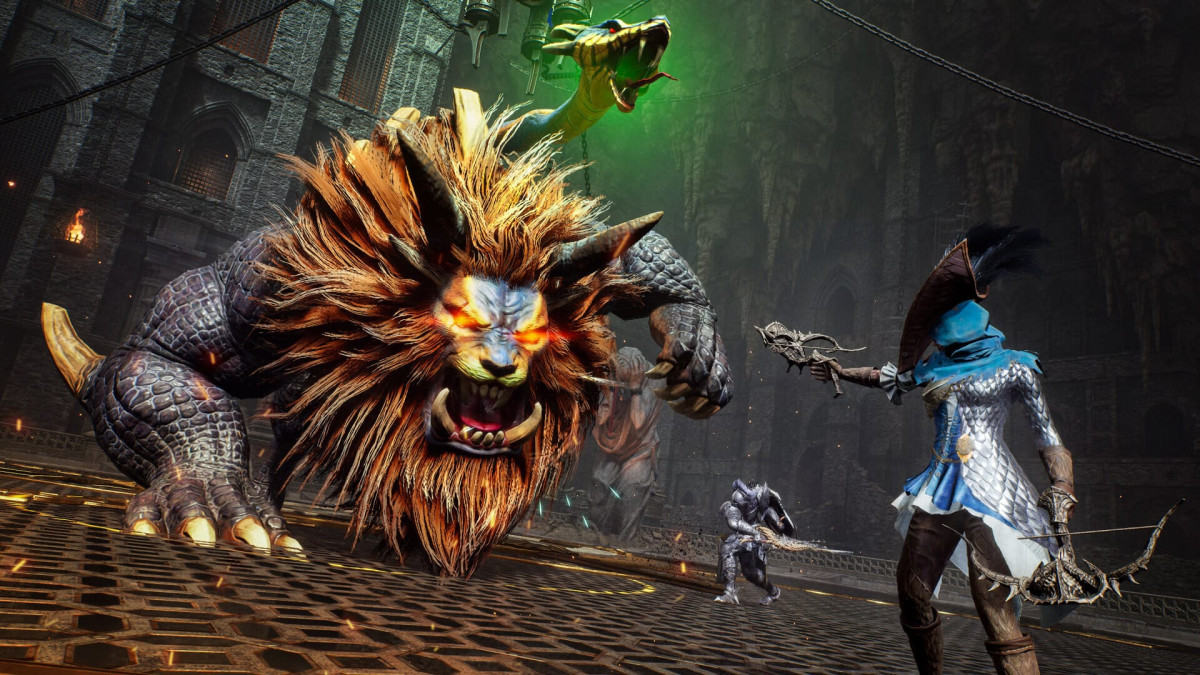
King Chimaerus
King Chimaerus is the final boss of the Roaring Temple in Throne & Liberty. Unlike the other bosses in this dungeon, King Chimaerus has several different mechanics that you need to look out for and requires a decent amount of situational awareness and coordination. Unwary players and uncoordinated parties will struggle to complete this boss fight.
Below is a list of Chimaerus’ special attacks and mechanics:
- Jump Attack – The boss does a jumping attack against the player with aggro. This should be the tank, so the rest of the group ideally won’t have to worry about this.
- Poison Spit – Chimaerus spits poison, leaving a poison AOE on the ground.
- Tail Swipe – The boss tail-swipes players who stand too close behind him.
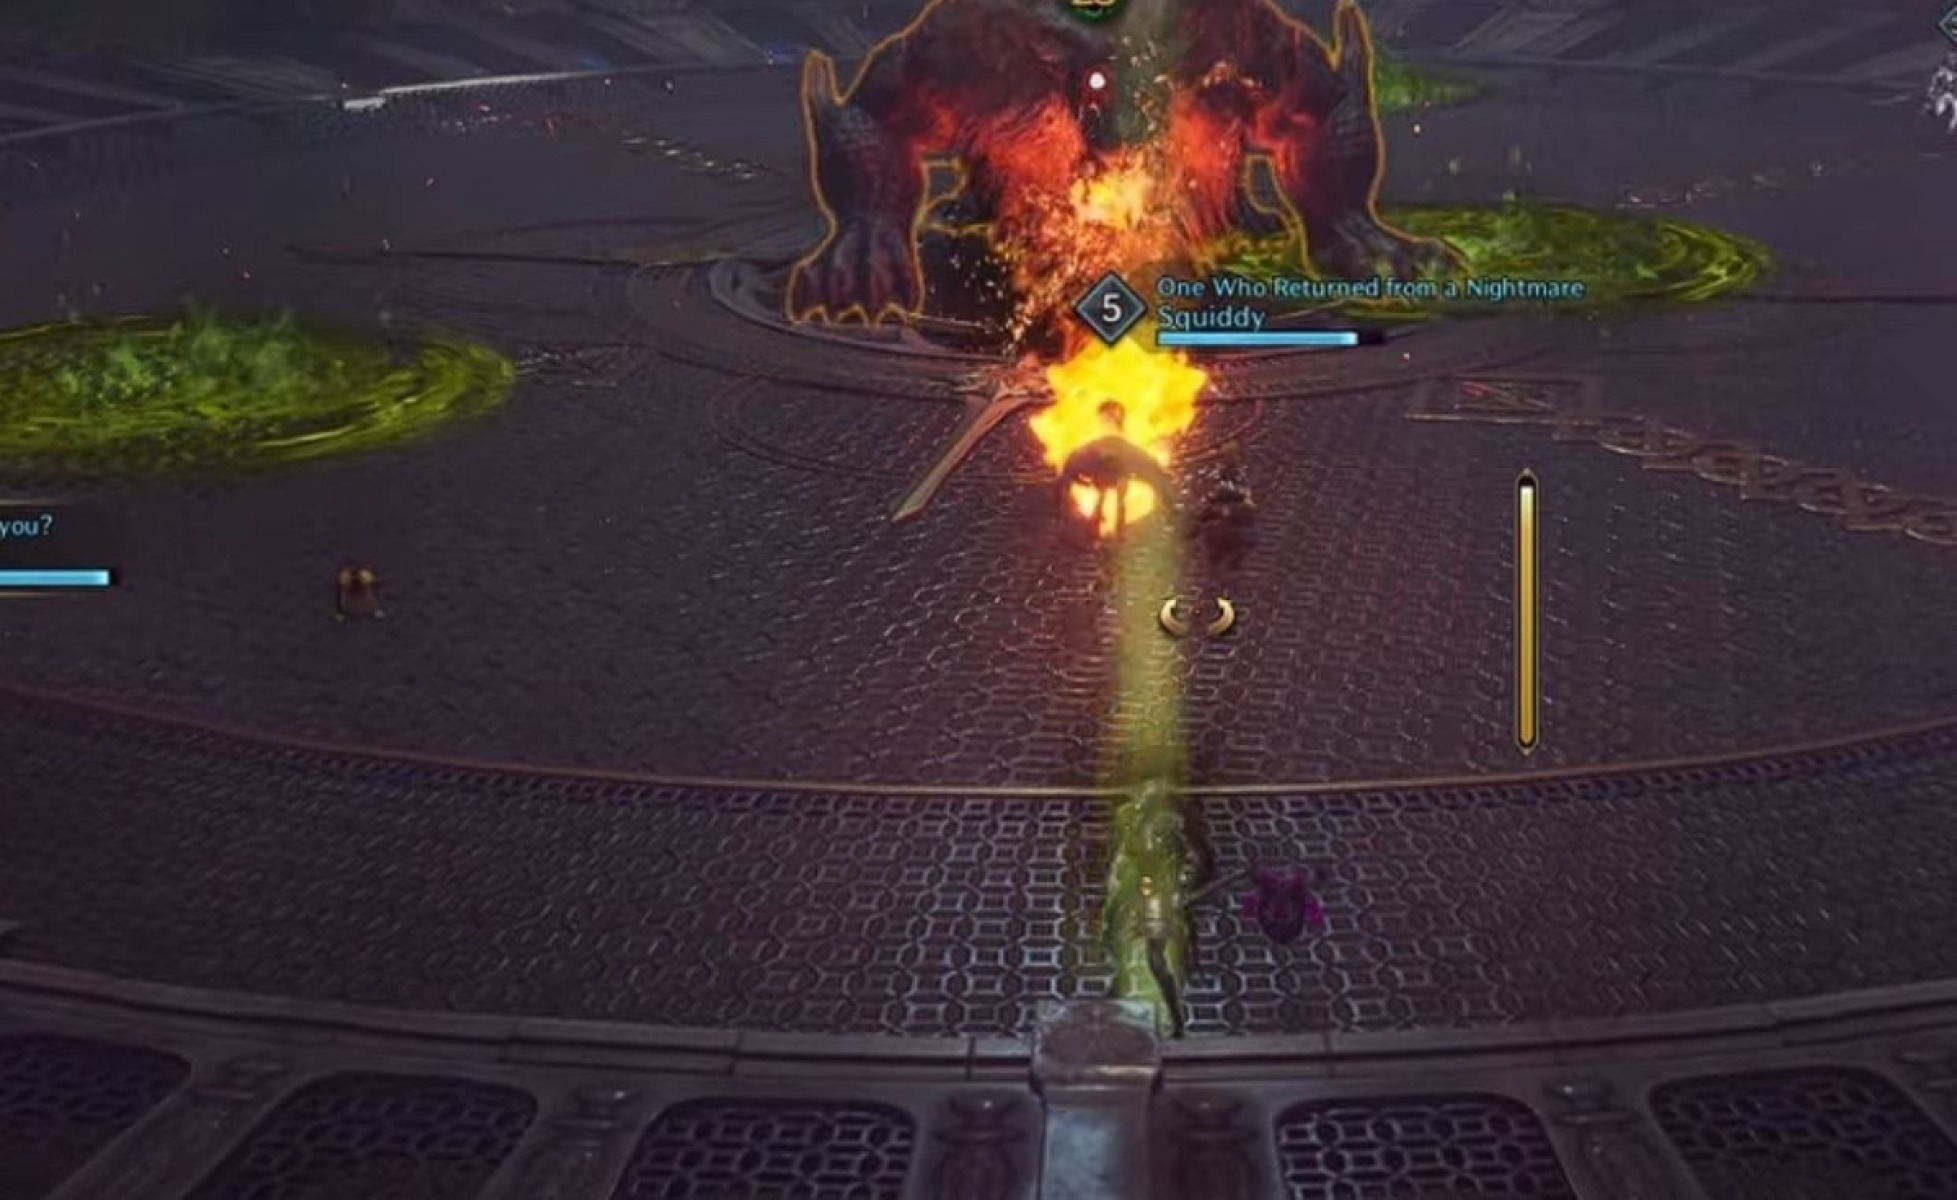
- Paralytic Venom – The boss chooses a random player who doesn’t currently have aggro and injects them with venom that will paralyse them after a few seconds. The chosen player can see this by a green pillar emanating from their character. This player needs to run behind the tank and ideally towards the edge of the room before the venom takes effect. The boss will then shoot three fireballs at the paralysed player – these will likely be fatal unless they are blocked by the tank, who must be standing between the boss and the paralysed player to block them. If the tank can't take all three fireballs, then other players in the group can help by blocking one of them.
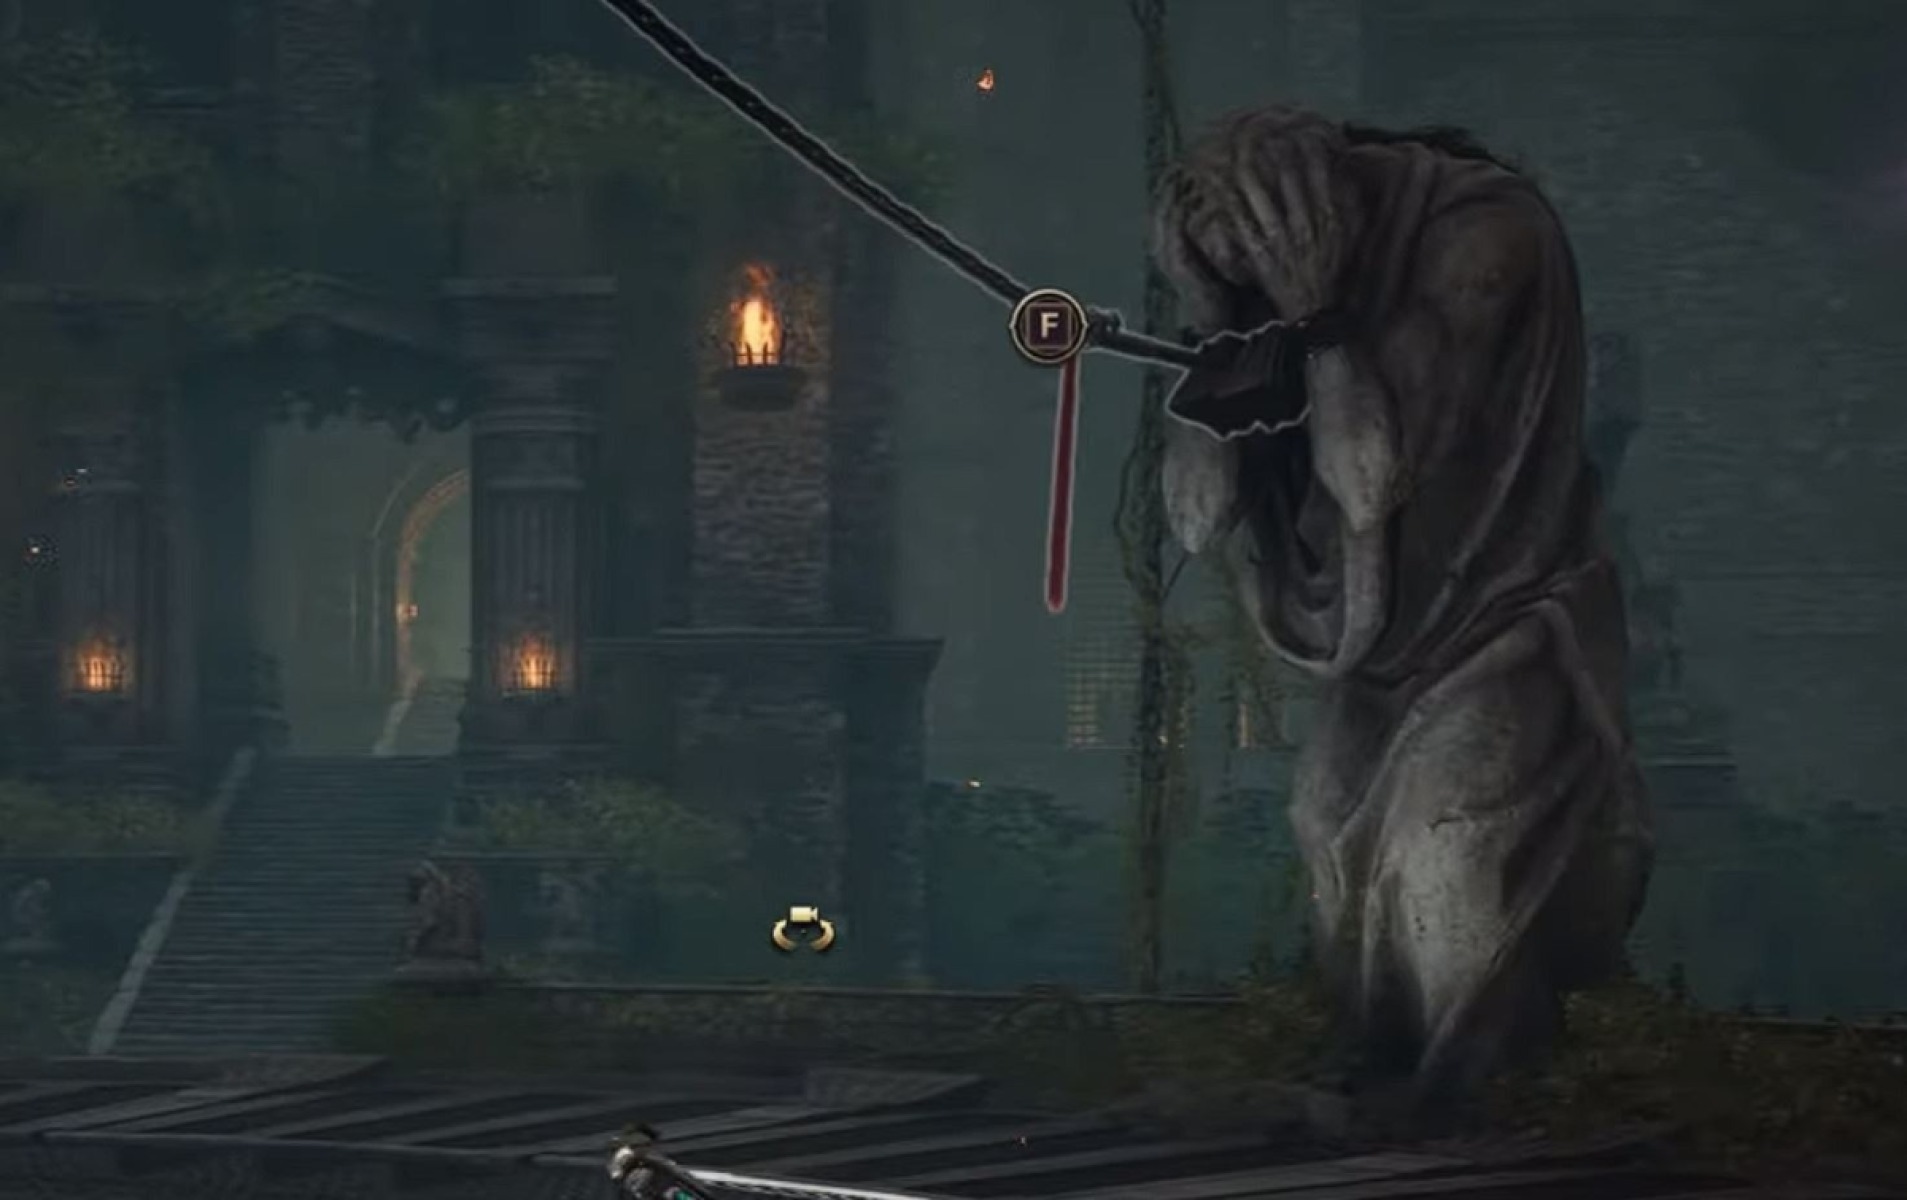
- Fire Wave – After the previously mentioned Paralytic Venom phase, Chimaerus will go to the middle of the room and begin channelling an AOE fire wave that covers the entire room. There are four chains around the edges of the arena that can be pulled by grappling them. All four chains must be pulled simultaneously, with one player on each chain. This will unleash a torrent of water to douse the boss. Failing this, the AOE wave will continue until all party members die. Due to this mechanic, voice communication is helpful for groups playing through this dungeon, but at the very minimum, you should assign a player to each chain before starting the Chimaerus boss fight.
King Chimaerus will repeat these attacks and mechanics for the duration of the fight. Once you have dealt with everything once, it is just a rinse and repeat until the boss dies. This is the first group dungeon boss in Throne & Liberty that requires real group coordination to beat, so if you have managed to finish it, congratulations!
We hope you liked this Roaring Temple dungeon guide for Throne and Liberty.
About the Author: Andrew
