Specter's Abyss Dungeon Guide for Throne & Liberty
Welcome to our Specter's Abyss Dungeon Guide for Throne & Liberty.
In this guide, we will explain how to complete the Specter's Abyss dungeon from start to finish, including the mechanics of the various bosses and mobs in the dungeon, and the best strategy for defeating them and successfuly finishing the dungeon.
Specter's Abyss is the first dungeon you can access in Throne & Liberty, becoming available when you reach Level 20. It is therefore usually regarded as the easiest dungeon, and a good place for beginners who want to learn the ropes of co-op dungeon play in TL.
For more guides about a variety of topics in TL, please check our Throne & Liberty Guides Database.
Specter's Abyss Mechanics and Strategy Guide
We will now walk you through the enemies and mechanics in each room of the Specter’s Abyss dungeon in Thone and Liberty, step by step.
Before we begin, please note that your tank should have at least one Crowd Control skill equipped - some enemies have powerful attacks that can wipe your group unless they are interrupted with Crowd Control. Other players can help with this if needed, but it should primarily be the tank's job so that other players can focus on doing DPS and healing.
Specter's Abyss First Room
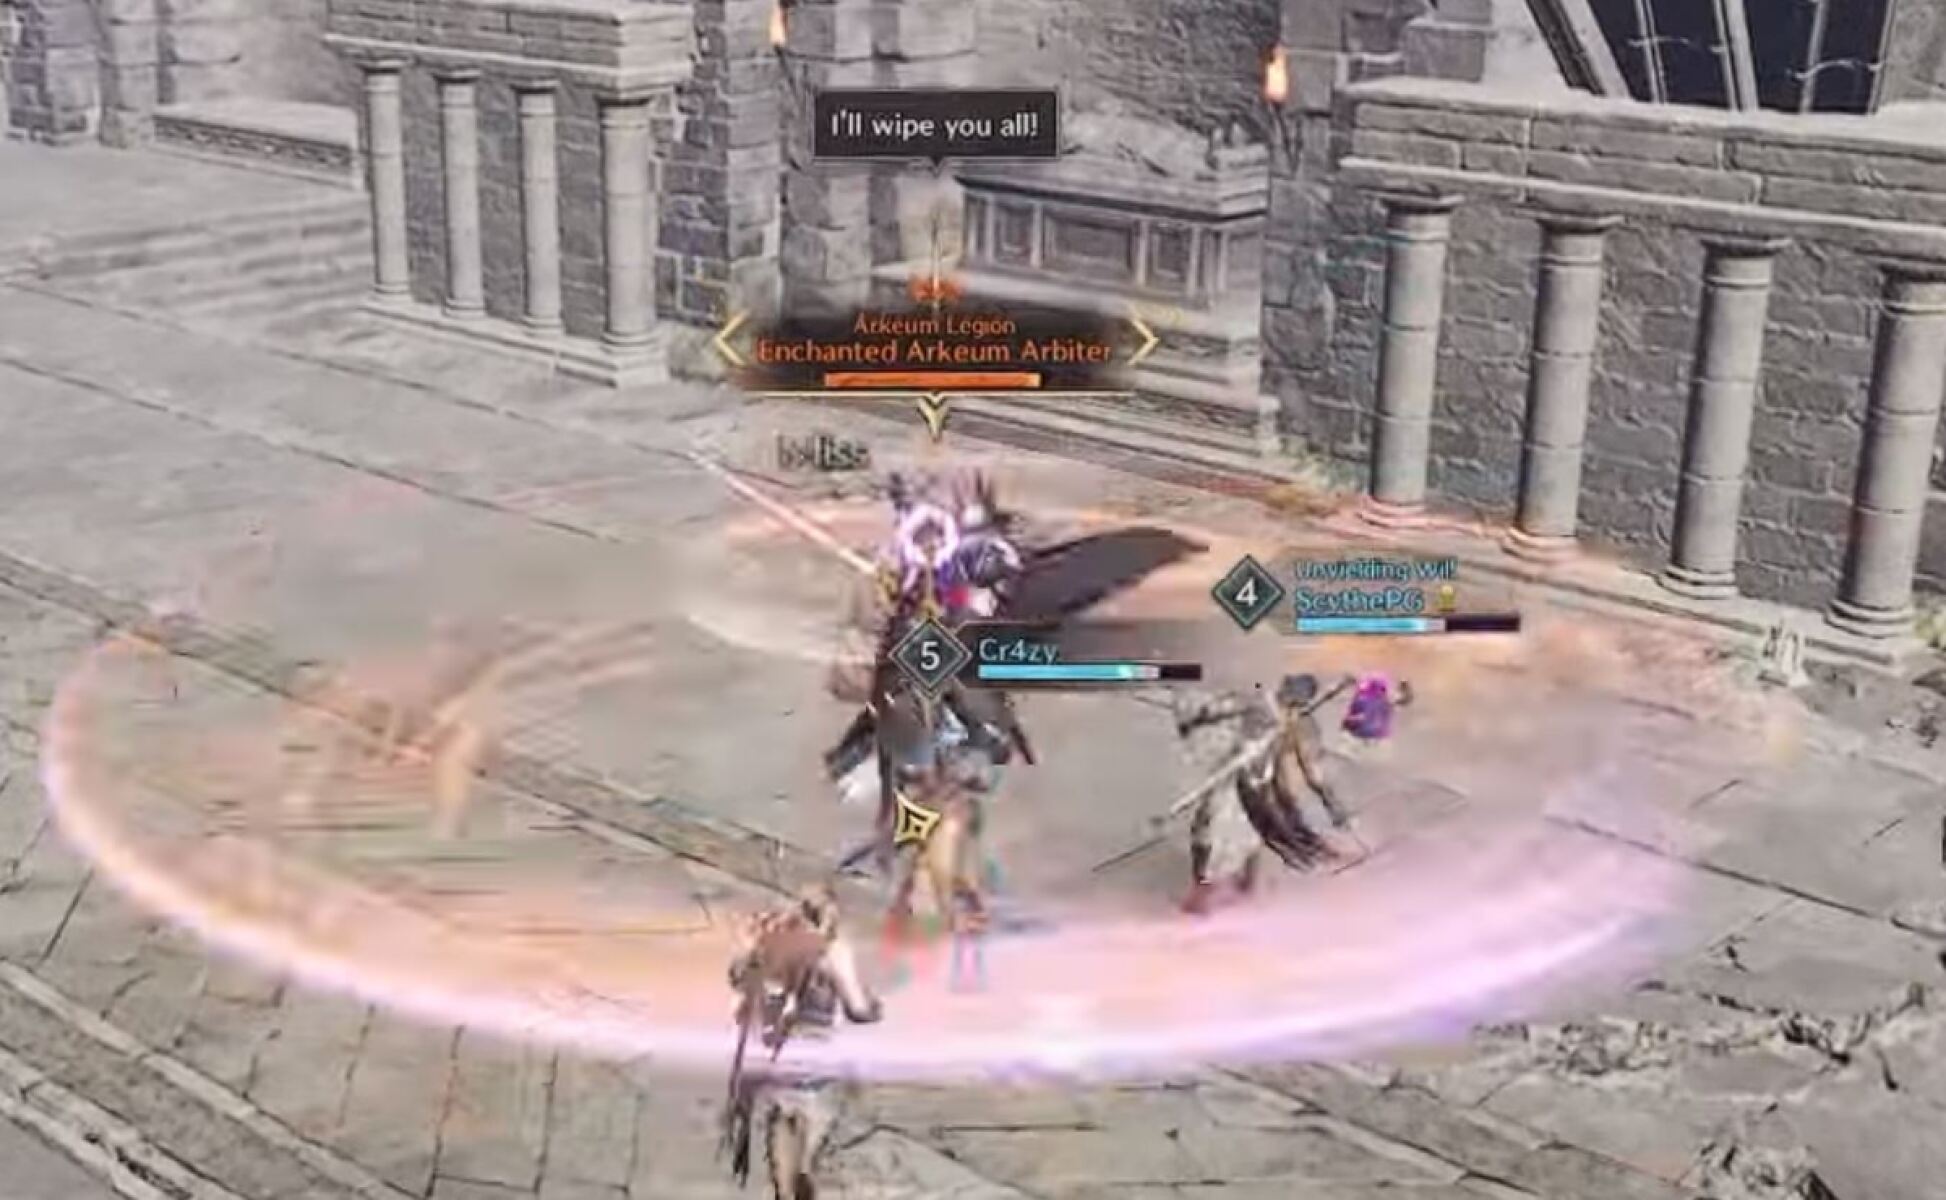
The first room of Specter’s Abyss contains some basic mobs and one Arbiter, a more powerful enemy.
The basic mobs don’t present much of a threat and can just be dealt with normally. The Arbiter has a large AOE attack that needs to be interrupted with a Crowd Control ability. The player(s) in charge of Crowd Control should listen out for the Arbiter’s shouted taunts; when you hear it, he needs to be interrupted. You can also see the attack when it happens; it looks like a yellow or orange circle originating from the Arbiter.
If something goes wrong (Crowd Control skills all miss, or the tank is dead), you can survive the mechanic by hiding behind a wall. This is not ideal as you lose DPS, but it works as a last resort.
Make sure you stay on top of this simple mechanic, and focus your DPS on the Arbiter to remove the threat as fast as possible.
Once this is done, you'll meet the Shadowmancer, the first boss of Specter's Abyss.
Specter's Abyss First Boss - Shadowmancer
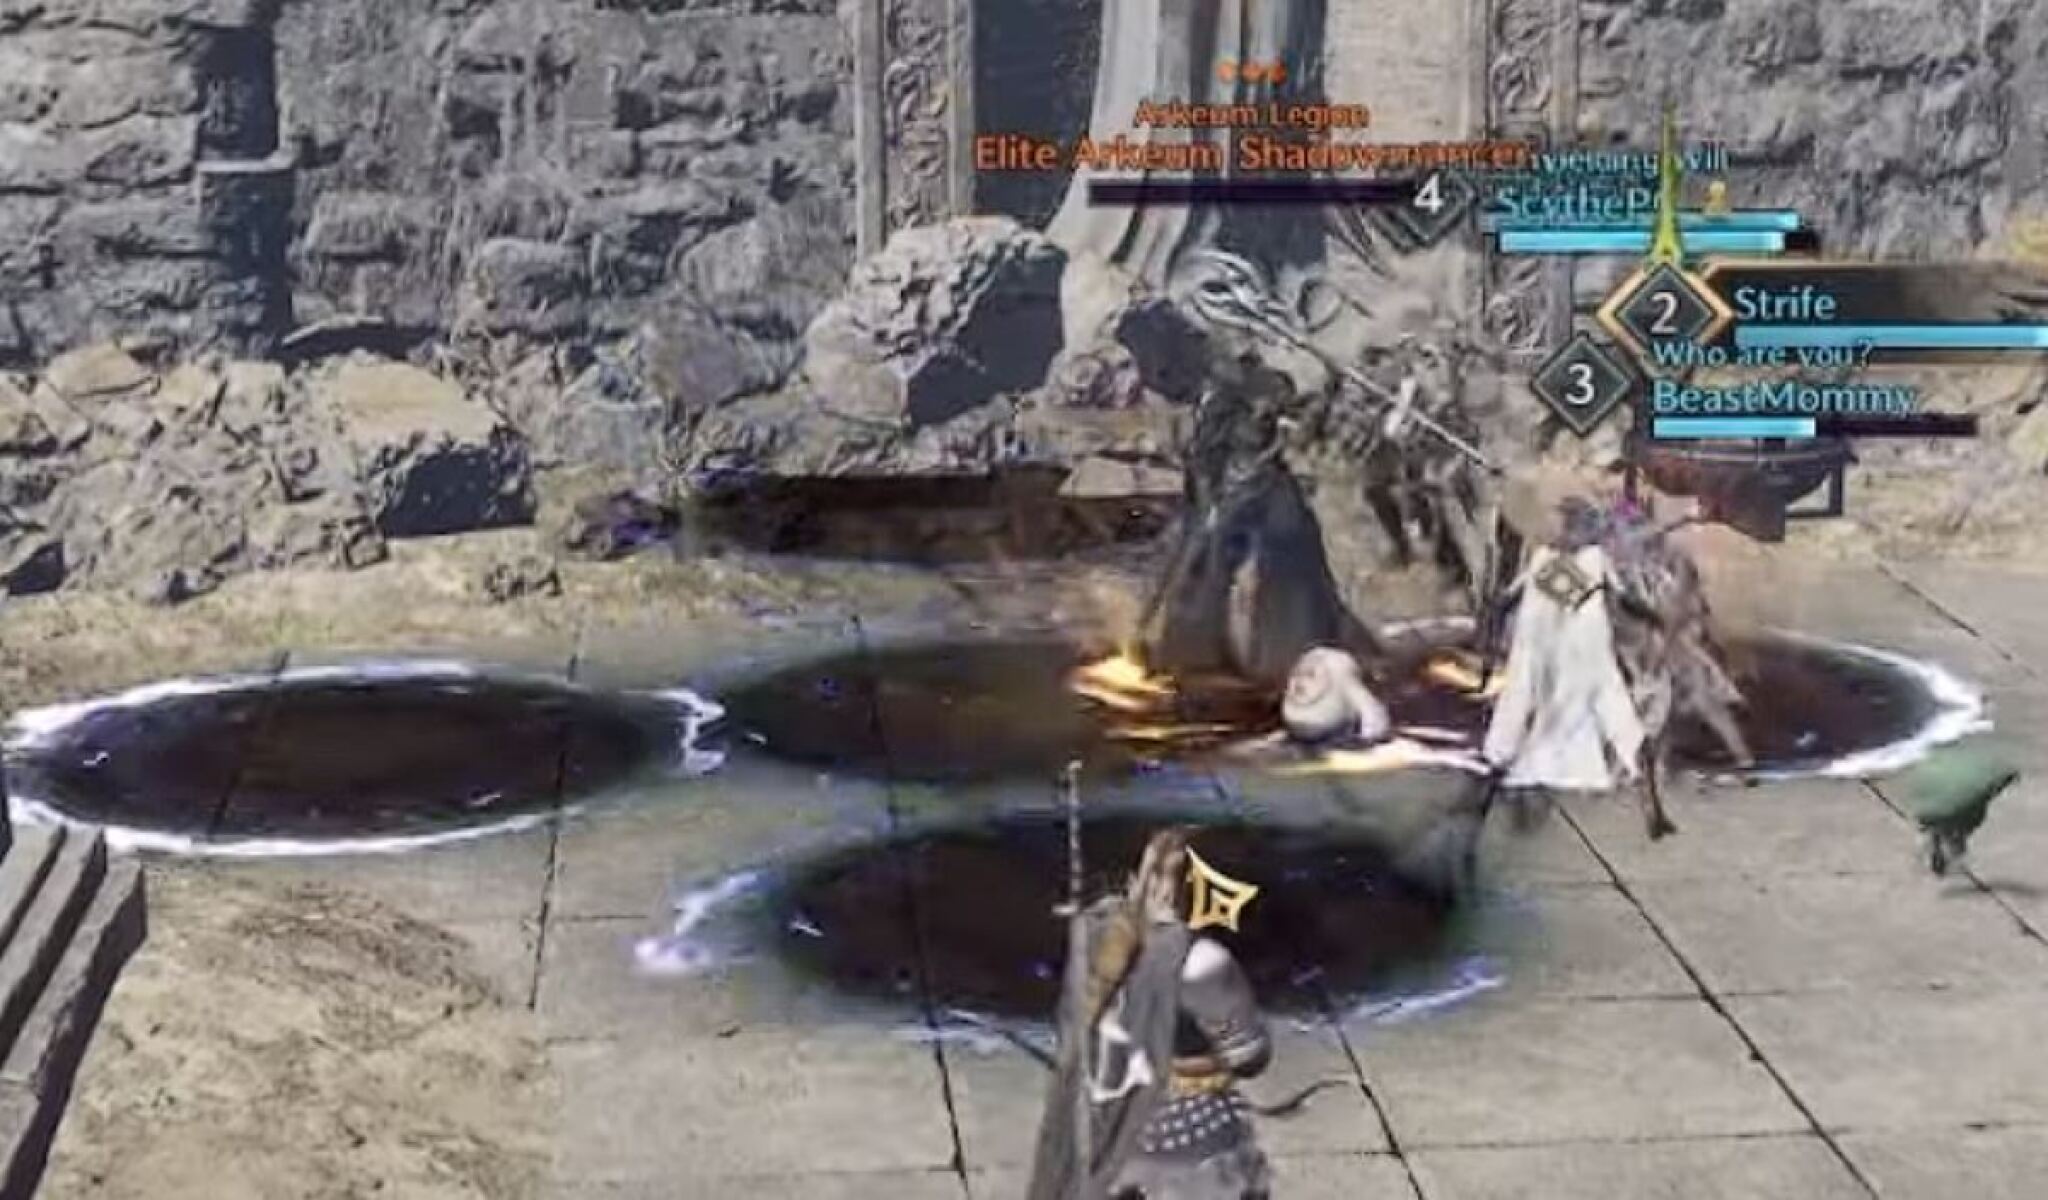
The Shadowmancer is quite an easy boss. He has only one dangerous mechanic. Periodically, he will choose a player and lift them in the air, rendering them helpless. They will eventually die without intervention. To stop this from happening, another player (ideally the tank) needs to Crowd Control the Shadowmancer to break the spell. This will release the player.
As the fight progresses, the Shadowmancer will summon dark circles on the floor. Avoid standing on these as they will damage you heavily if you linger there.
Specter's Abyss Twin Rooms
After defeating the Shadowmancer, you progress to the next area, which consists of two rooms and a locked gate. Each room contains a lever, both of which need to be pulled to unlock the gate. Defeat any mobs who are in the way and pull the levers.
The safest way is to do the rooms one by one, and if you're new, we recommend doing it that way. However, if your group is confident and skilled, you can try splitting it in half to make it faster. If you do this, send the tank and 2 DPS to one side and the healer and 2 DPS to the other.
Proceed beyond the locked gate and you will find the next boss, called the Riot Squad Captain
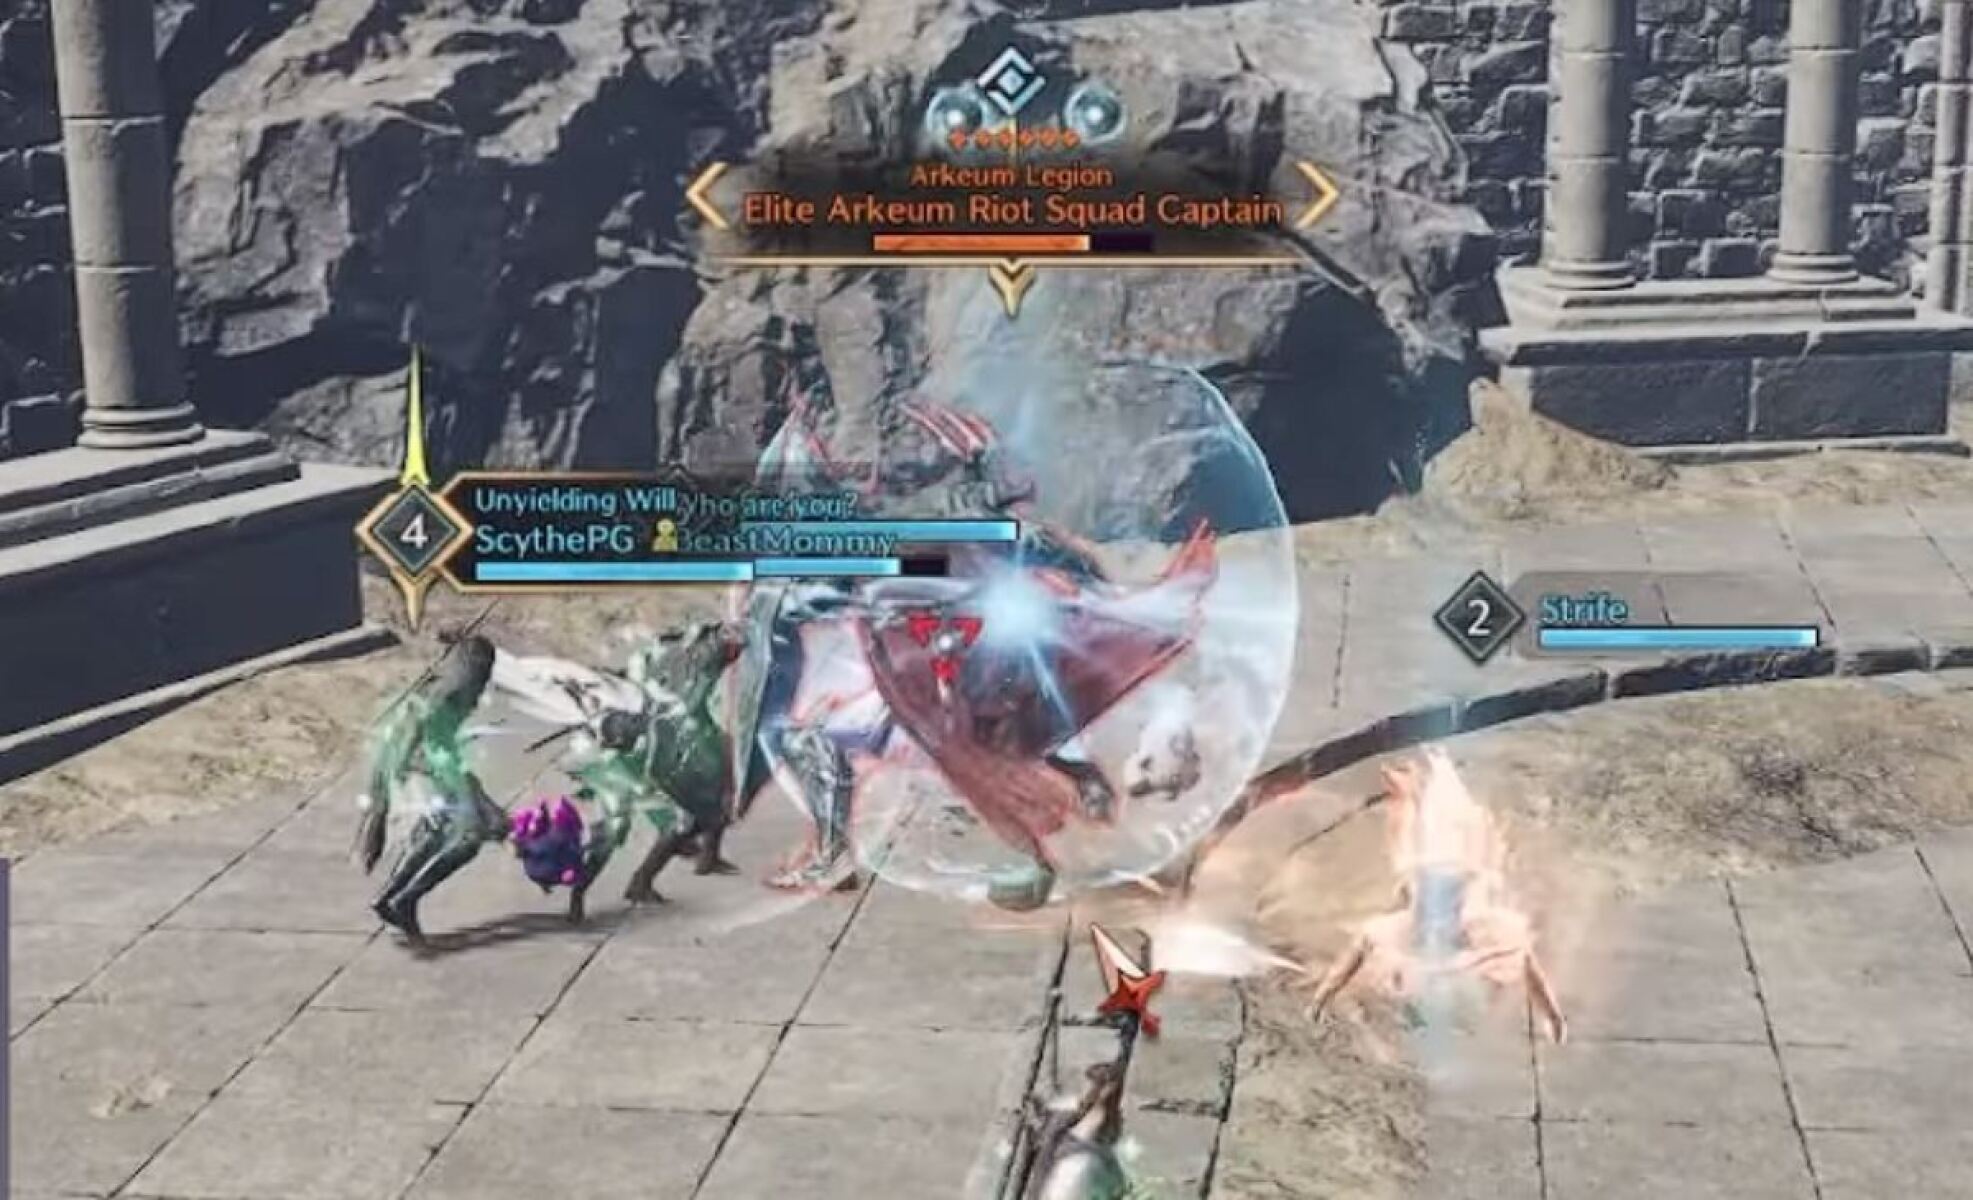
Specter's Abyss Riot Squad Captain
The Specter's Abyss Riot Squad Captain is a simple and easy boss on paper, and most groups won't have a problem with it. However, there is a DPS check, so if everyone in the party is a beginner then it could be a bit trickier.
Like the Shadowmancer, the Riot Squad Captain has only one dangerous mechanic. This mechanic has two parts:
- The boss shouts a taunt, then becomes protected by a blue shield. This shield needs to be broken by dealing enough damage to it.
- After a few seconds, the boss sends out a wave of heavy AoE damage. It can be prevented with a Crowd Control ability, but only if you broke the shield.
If your group doesn't have enough DPS to overcome the shield in good time, this boss can suddenly become a lot harder. If this is the case, you can manage the problem by telling your DPS players to save their most damaging skills until the shield mechanic happens, then using them up to ensure the shield is broken.
The boss will repeat the mechanic periodically. Once you've defeated him, you can move onto the final boss of Specter's Abyss.
Specter's Abyss Final Boss - Heliber
In the middle of the final room of Specter’s Abss, you will find a red magical prison. Interact with it to activate Heliber, the final boss of this dungeon.
Unlike the previous bosses, Heliber has multiple mechanics, these are listed below:
- Conal AOE - Heliber casts a cone-shaped AOE at the player who currently has aggro. This should be the tank, and they should face the boss away from the group so that this does not hurt any party members. Other players should stand behind the boss for safety. Avoid standing next to the tank without good reason, otherwise you are likely to be caught by this mechanic.
- Teleport - Heliber will periodically teleport to the furthest player away from him. Players should be mindful of their positioning and avoid standing too far away from the boss, otherwise it can get messy as the tank will be forced to reposition the boss, and players may get caught in the cone AOE, which could be cast in an unusual direction as a result of the boss teleporting too far away.
- Bubble - One player gets a bubble on them. Every player needs to stand inside the bubble quickly - anyone who doesn’t do this will be one-shotted. Groups who aren’t aware of this mechanic or who ignore it will be unable to finish this boss fight.
Once your group has got used to these simple mechanics, Heliber should be quite an easy boss fight.

We hope you liked this guide about the Specter's Abyss Dungeon in Throne & Liberty.
About the Author: Andrew
