Torture Chamber of Screams Dungeon Guide - Throne & Liberty
Welcome to our dungeon guide for the Torture Chamber of Screams, a ++ difficulty dungeon in the Throne & Liberty Dimensional Circle.
This dungeon has a minimum level of 50, and is one of the more complex dungeons in this difficulty rating. In this guide, we will explain the various mobs and bosses, their mechanics, and the best strategy for beating them.
For more guides about a variety of topics in TL, please check our Throne & Liberty Guides Database.
Starting Mobs
At the beginning of the dungeon, you'll be introduced to some dangerous mob enemies. The most notable enemy here is the Brainwashed Guard. There are several of these - their mechanic is a deadly charge attack that one-shots players who are hit by it. Listen out for the voice line and dodge before the charge hits you.
There are many smaller mob enemies who will launch Fury Attacks at players. Individually they don't do much, but collectively they can be a big problem.
The easiest way to deal with this part of the dungeon is to get your tank to aggro and kite all of the small mobs, while the DPS players deal with the Brainwashed Guards one by one. The small mobs can then be defeated when all of the Brainwashed Guards are dead.
First Boss - Torture Chamber Warden
The Torture Chamber Warden is the first boss found in the Torture Chamber of Screams dungeon in Throne & Liberty.
It has the following mechanics:
- Fury Attacks - The Torture Chamber Warden has a Fury Attack that needs to be blocked or dodged. Getting hit by the boss too many times can trigger a mechanic where the offending player is one-shotted.
- Executioner's Axe - After the boss is defeated, one player can pick up his axe, which will morph the player into the boss. This replaces their skills with special attacks which make it much easier to defeat the mobs in the dungeon. The third ability on this player's new skill bar is important to progress beyond the next area of the dungeon.
Cell Puzzle
After the first boss, you will need to defeat some more adds. You will then come to a room with four glowing red symbols on the wall. These symbols roughly correspond to real letters and symbols, so someone in your team should write the code down in chat, as you'll need it soon.
Next, you'll find a room with several cells. Open all of the cells and kill the enemies within. The player with the axe can use their ability to see red symbols corresponding to each cell. The symbols need to be activated in the same order that they were seen in the previous room. Doing this successfuly will unlock the door to proceed to rest of the dungeon.
Scream Collection Devices Puzzle
After completing the Cell Puzzle, you must jump over some spike traps, and are then greeted by another puzzle.
There are three red orbs, called Scream Collection Devices. Weak mobs will constantly spawn. Pull them next to an orb and kill them to fill the orbs. When an orb is full, it will get a HP bar, and the adds will start trying to attack it. If its HP runs out, you'll need to fill it up again. Crowd Control skills can help to make this part easier by stopping the mobs from attacking the orbs.
You must fill up all three orbs, which will open a portal to advance to the second boss.
Second Boss - Master Torture Technician
The second boss of Torture Chamber of Screams is the Master Torture Technician. This boss fight is quite easy as long as you have decent situational awareness. Its mechanics are rather unusual but not especially complicated:
- Fury Attack - The boss directs a Fury Attack at a player, which must be blocked.
- Red Squares - The floor is made up of many square slabs. When the mechanic happens, most of the slabs will glow red. You need to look around for a slab that is not red, and run there. After a few seconds, spikes will erupt from all of the red slabs. You then need to make your way back to the boss in the middle of the room. You are supposed to do this by attacking and destroying the spikes, but it's possible to dodge your way through them instead (this worked at the time of writing, but might be patched).
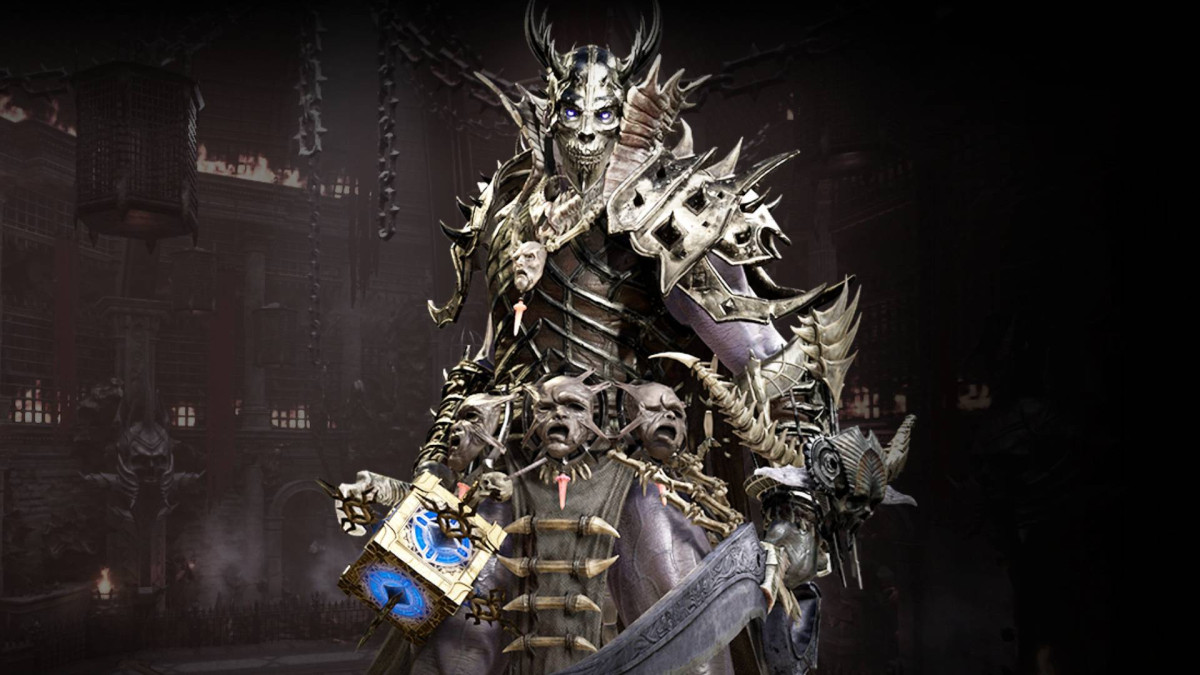
Chamber of Screams Final Boss – Kaligras
In this section, we’ll explain how to survive and defeat the Kaligras boss in the Chamber of Screams in Throne & Liberty.
Important Requirements: Your group should have a tank with the Stalwart Bastion skill upgraded to at least level 4. In addition, all members of the group should have at least 200 Skill Damage Resistance to ensure they don’t take too much damage from the mechanics in the Kaligras boss battle.
Fury Attacks
There are two different Fury Attacks that will happen during the Kaligras boss fight in Throne & Liberty. The easiest way to tell the difference between the two Fury Attacks is to look at the purple icon, as explained below:
- Purple Circle – This is a Fury Attack that will hit all players in an AOE. Perform a normal block (standing still) to negate the damage.
- Purple diamond – The second Fury Attack is represented by a purple diamond or square indicator. To avoid this you need to perform a movement block (sometimes called a dodge). To do this, use your block skill while holding a directional key to move in any direction.
These attacks usually happen at the beginning of the fight, and then in specific phases later in the fight.
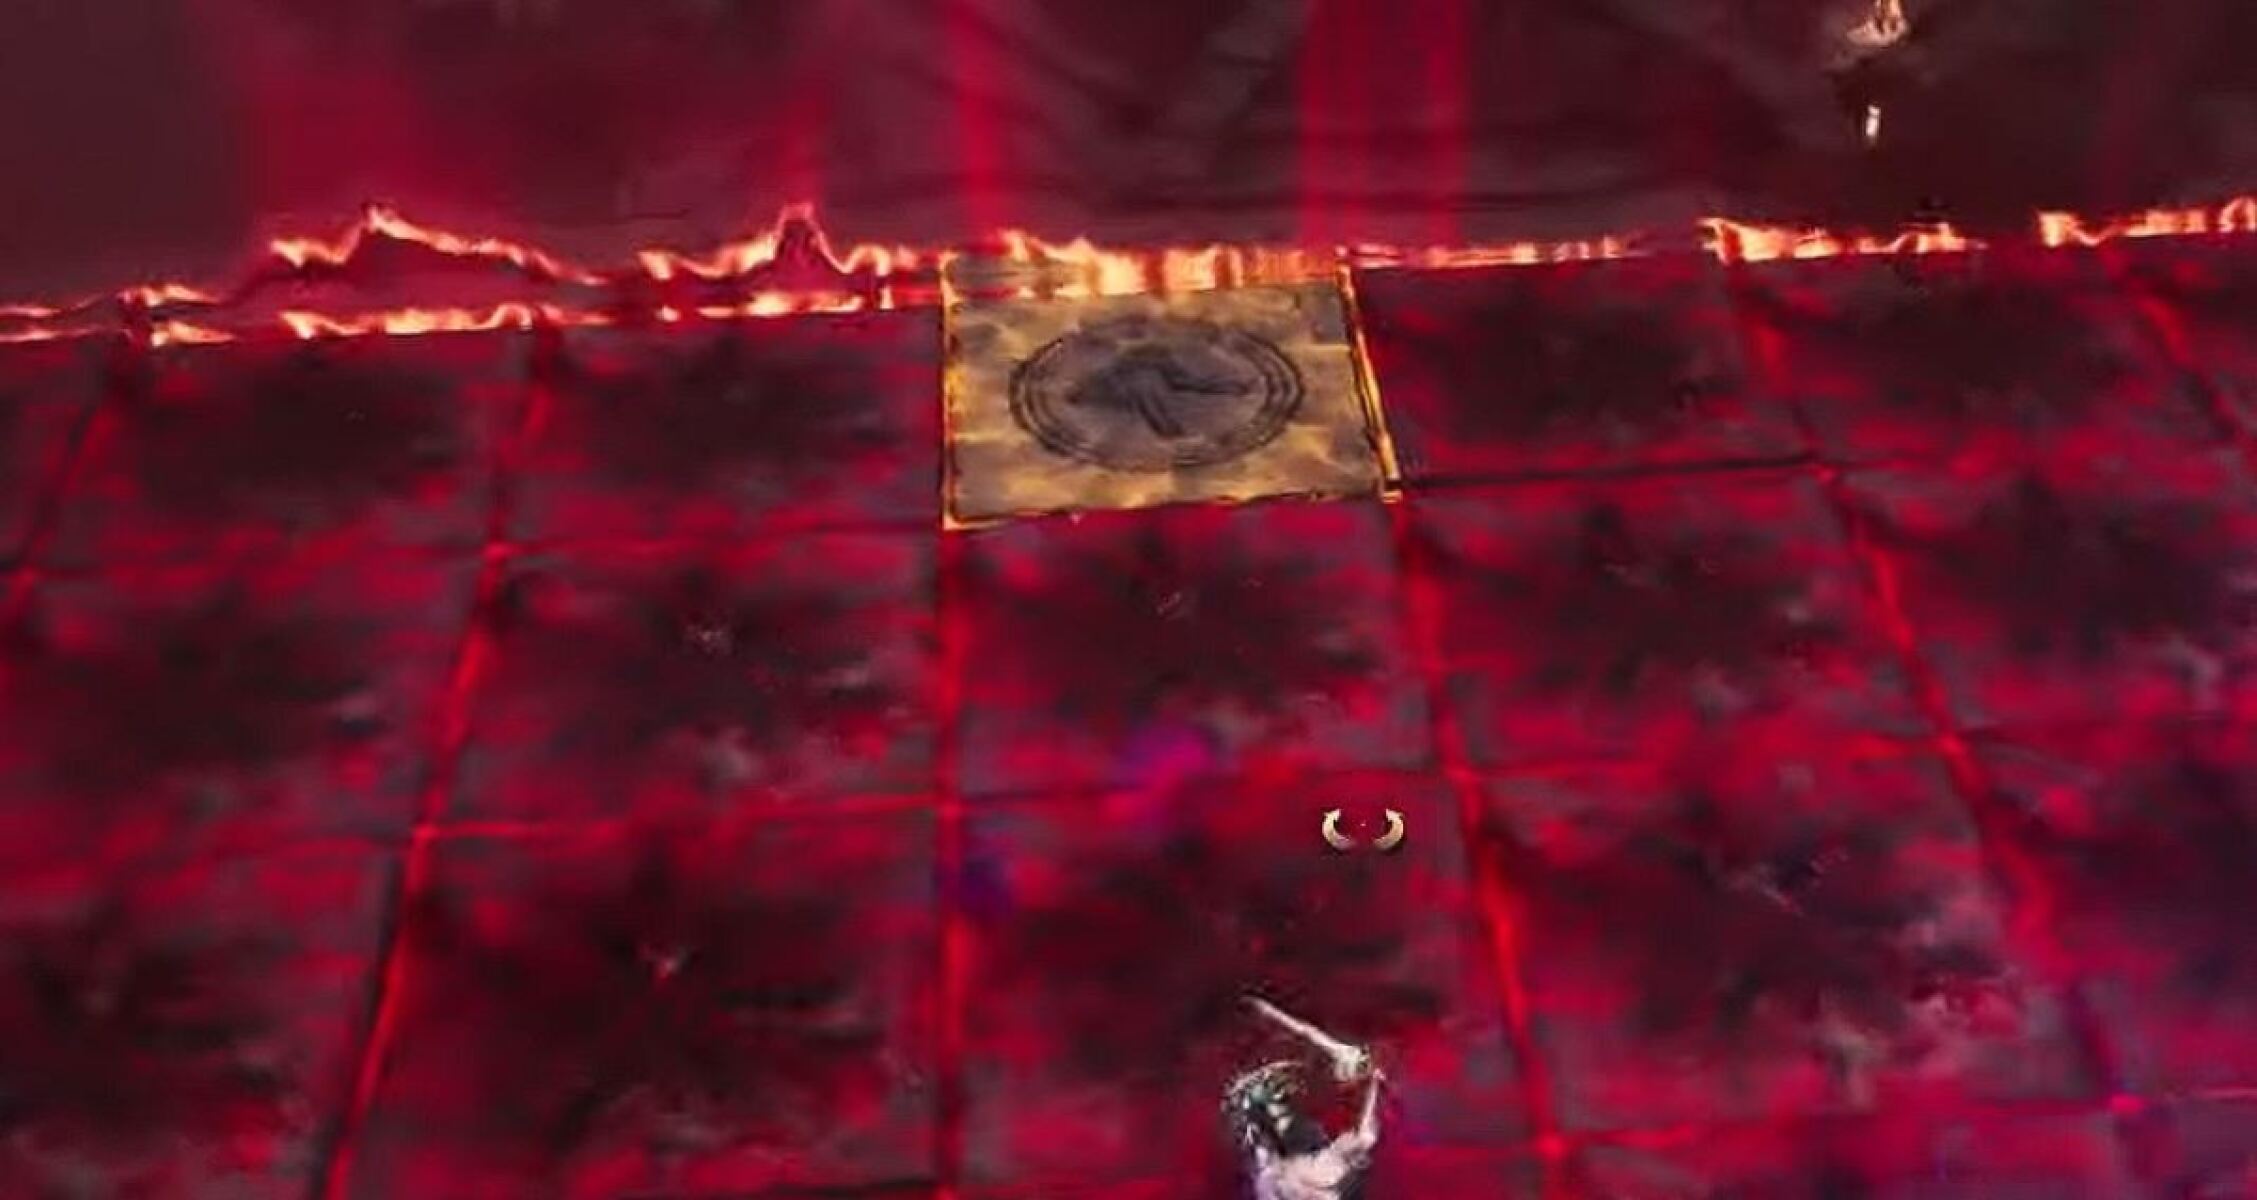
Blood Vials – Torture Chamber of Screams
This is the most important mechanic that is always active during the fight.
There are five Blood Vials in the room, which can be filled or emptied by various events and actions throughout the fight.
Blood Vials will fill up under the following circumstances:
- Various boss attacks add blood to the vials
- Players failing to block a Fury Attack will add blood
- The Blood Swirl mechanic mentioned below will always generate three full vials of blood.
The vials can be emptied during and after the Zombie phase, mentioned below.
If all vials are full or all vials are empty, the party will wipe.
Arrow Rain
He will then rain arrows down over several players, effectively creating an AOE that may appear above you. You should aim to quickly move out of this attack to avoid the damage.
Marked Shockwaves
Three players in the group will then have a red marker placed on them. The marked players will have several shockwaves launched in their direction. These shockwaves can hit any player, not just the marked ones, so it’s a good idea for the marked players to spread out evenly to keep the rest of the group relatively safe from the mechanic. Getting hit by one shockwave is usually fine, but being hit by several in quick succession can easily be fatal – this is much more likely to happen if the marked players don’t spread out, as three shockwaves will be sent in the same direction at the same time, dooming anyone in their path.
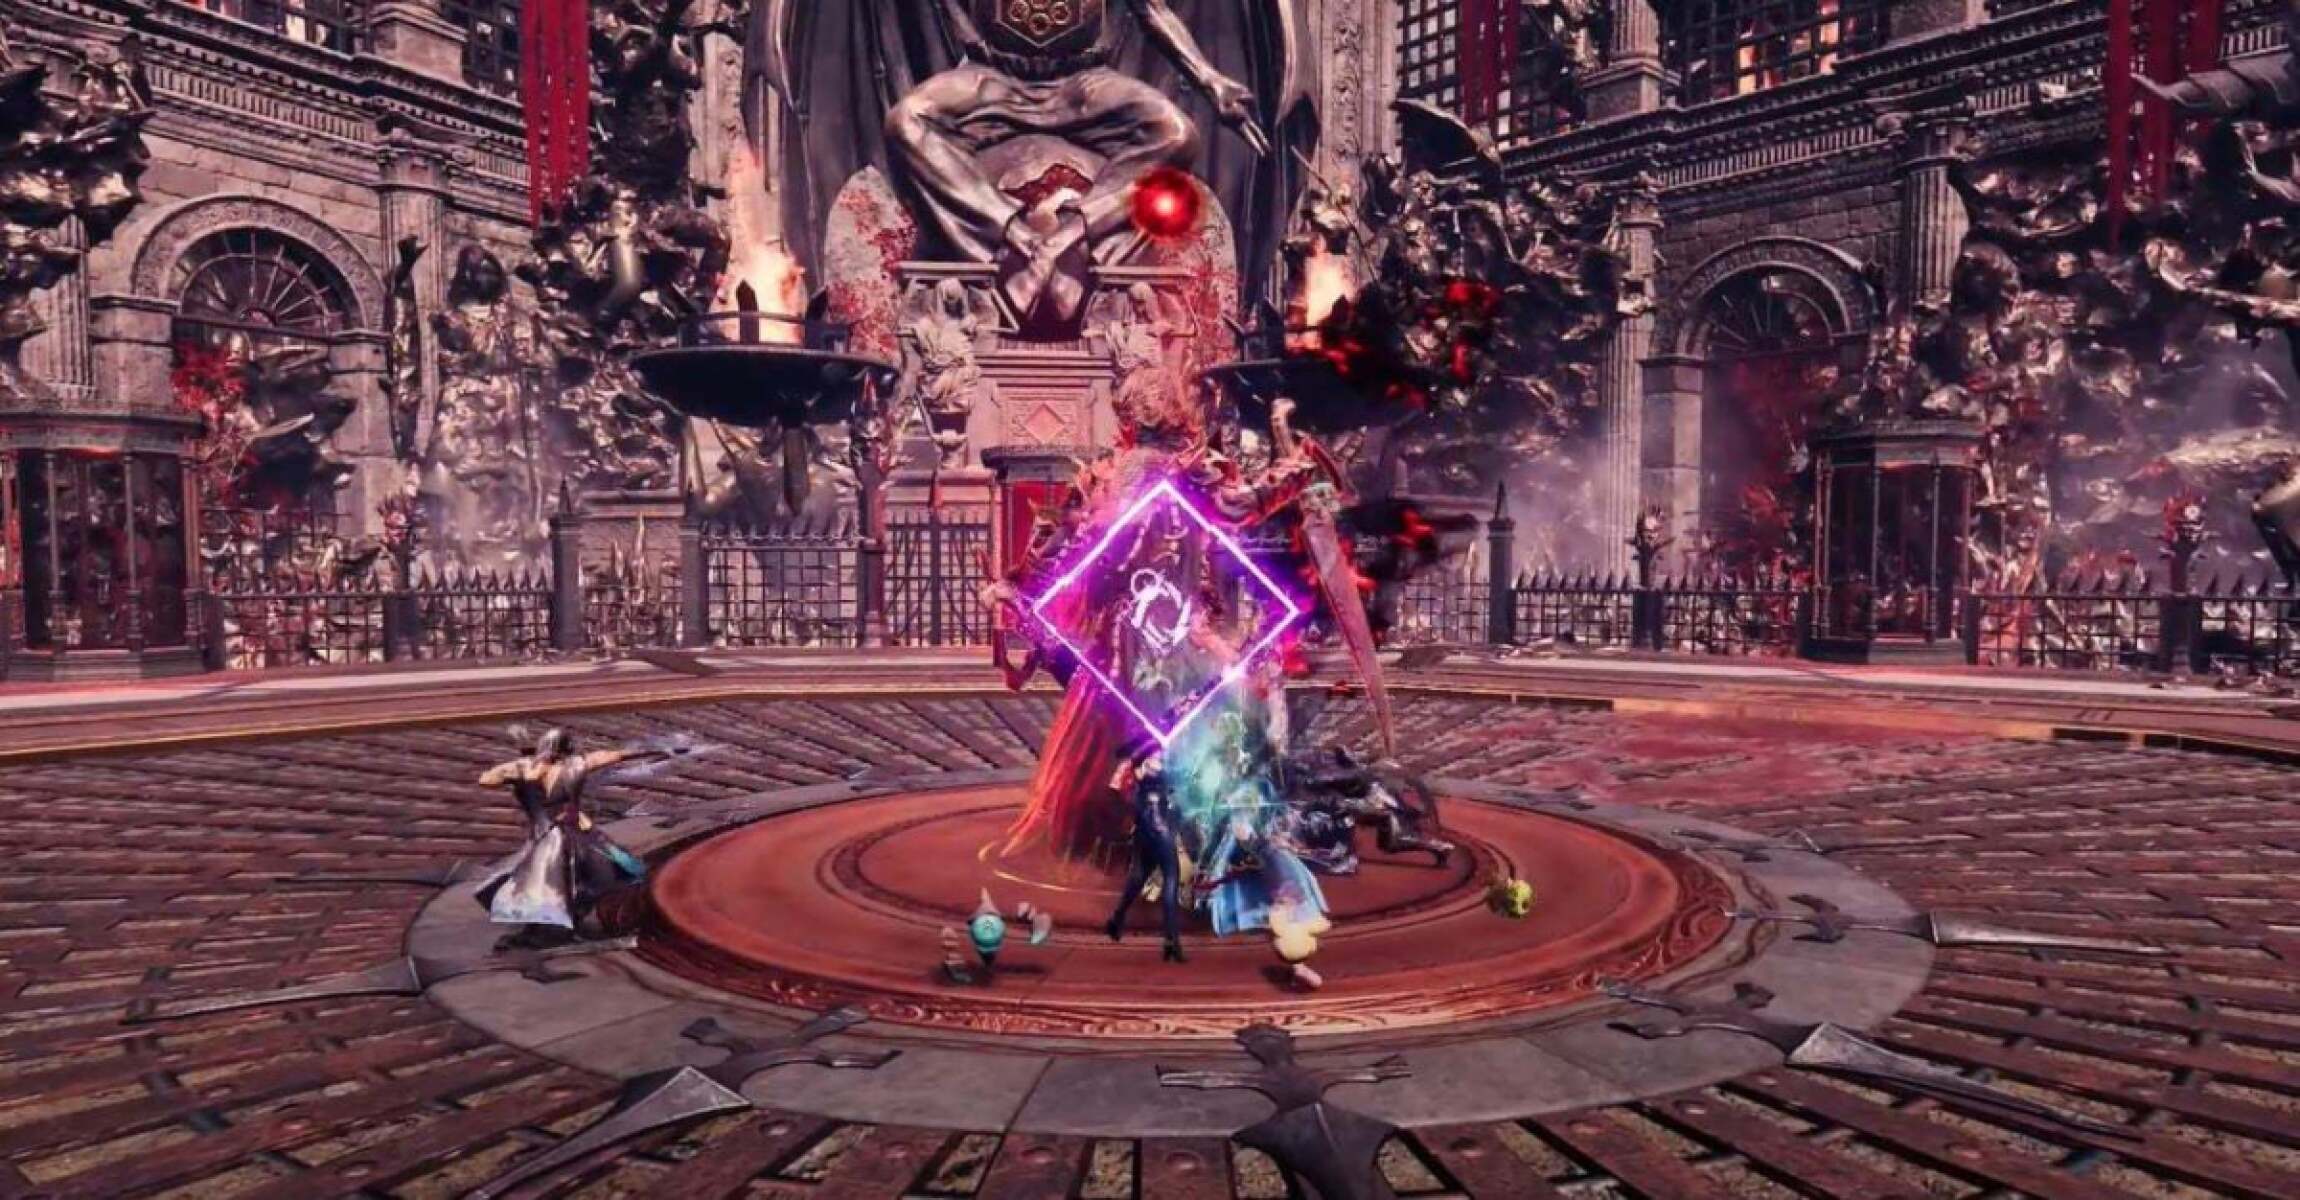
Blood Swirl
Every player in the battle will now have a red circle placed on them. Take care not to overlap the circles as this will cause players to take double damage and almost certainly die – organise your group’s positioning to prevent this from happening.
This mechanic is why the tank is advised to bring Stalwart Bastion and why other players should have a baseline of at least 200 Skill Damage Resistance. The tank should use their Stalwart Bastion at the beginning of this mechanic to help everyone to stay alive, and the group’s healer should also do their part to help them survive. In general, you should stack as many mitigation and healing buffs as needed into your party until you are certain that everyone can survive this mechanic.
Three of the blood vials will fill during this phase. Remember that if all five are completely full, the group will wipe.
Teleport Charge
Kaligras will choose a player and teleport them to the other side of the arena, locking them in place. He will then charge to the bound player, instantly killing them upon contact.
To prevent this, the rest of the team need to stand in a line between the targeted player and the boss. They will then need to successfully block three Fury Attacks to stop the fatal attack from happening. The boss will then fire a beam at the closest player, dealing heavy damage. Try to position your group so that the player who gets the beam is the tank, as they can survive it much more easily than everyone else.
Zombie Phase
The room is concealed by a thick fog, and several zombies spawn into the room. Three players are marked by an eye symbol – an identical eye symbol will appear over the zombie that is following a player.
The players need to head to a blood vial and drain it in order to identify their zombie’s “number”. This number tells you where you need to position the zombie – it will be a number from one to five. Number five is near the edge of the arena, by the blood vials, whereas number one is close to the middle of the room.
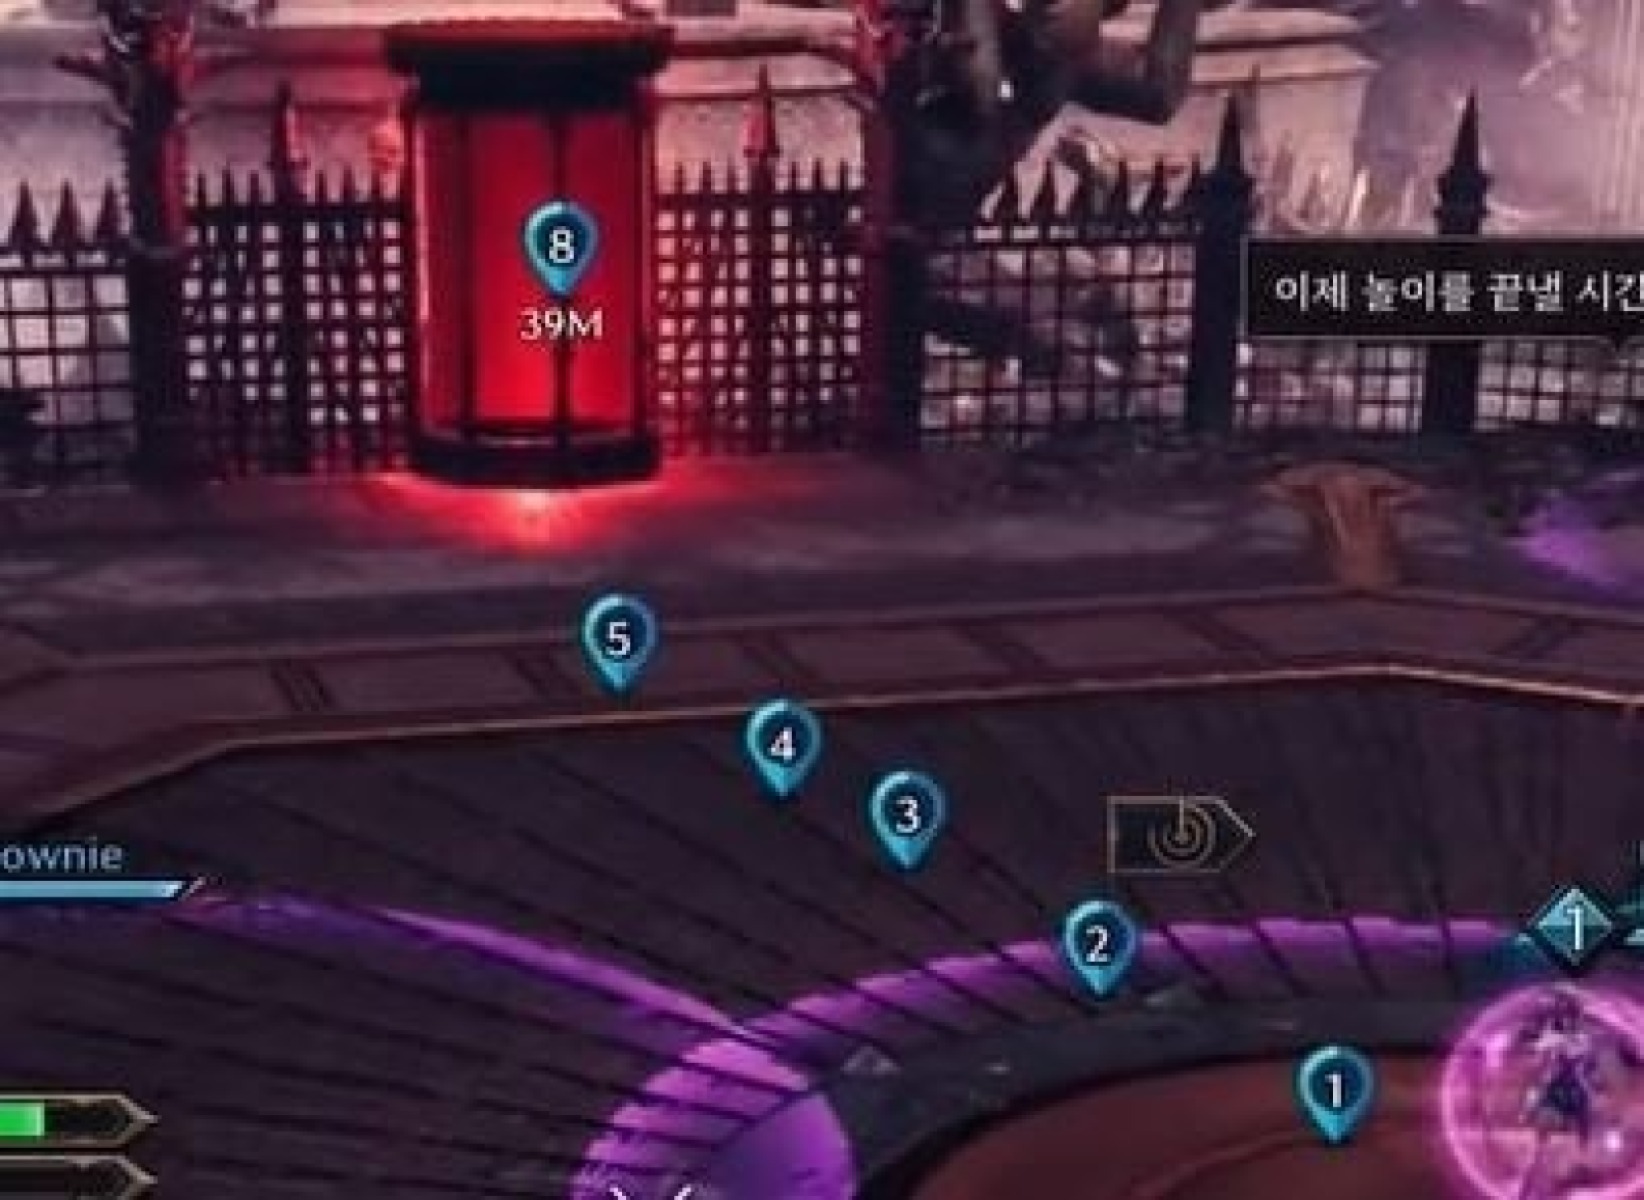
You need to find the correct position and head there – your zombie will follow you. If you’re in the right position at the end of the phase, you’ll be briefly stunned and can then carry on as normal. Players in the wrong position will instead be killed by a ghost.
It’s important to have three vials full (with some excess) at the start of the phase, as this allows the three vials necessary for the mechanic to be emptied, without triggering the wipe that happens if all five vials are completely empty.
After the Zombie phase, one player remains marked and able to interact with the vials. It is this player’s job to manage the blood levels, emptying vials if necessary. For example, if you are going to get the Blood Swirl mechanic again, ensure that you only have one full vial at most, as the mechanic will fill three of them – this means that if more than two vials are full at the start of the Blood Swirl, you are going to wipe before the end of the mechanic.
We hope you liked this guide for the Torture Chamber of Screams in Throne & Liberty.
About the Author: Andrew
