Voidwastes Dungeon Guide - Throne & Liberty
Welcome to our dungeon guide for Voidwastes in Throne & Liberty.
Voidwastes is a ++ difficulty dungeon, making it a tricky challenge aimed at more experienced players.
For more guides about a variety of topics in TL, please check our Throne & Liberty Guides Database.
First Boss - Blatras
Blatras is the first boss of Voidwastes in Throne & Liberty. This boss has just a couple of mechanics, and is quite easy to beat. He only has two significant mechanics:
- Blue AoEs - The boss spawns blue AoEs on players all around the room. Move out of these to avoid the damage.
- Maze - Blatras spawns a maze of glowing cracks in the ground. Run to the outside of the arena without touching any of the cracks. It's possible to skip this mechanic if your group has very high DPS.
Second Boss - Belkros
Belkros is another easy boss. He has the following mechanics:
- Frontal Sweep - The boss does a frontal sweeping attack. The tank should face the boss away from the group to keep them safe from this. Sometimes Belkros does a Fury Attack version of this attack, which needs to be mitigated with a well-timed block.
- Square - Belkros summons a square around him. Players need to escape the square to avoid dying to the mechanic. To do this, activate the orbs on the edge of the square to remove one of the edges, allowing players to escape. It's possible to skip this mechanic if your group's DPS is high enough.
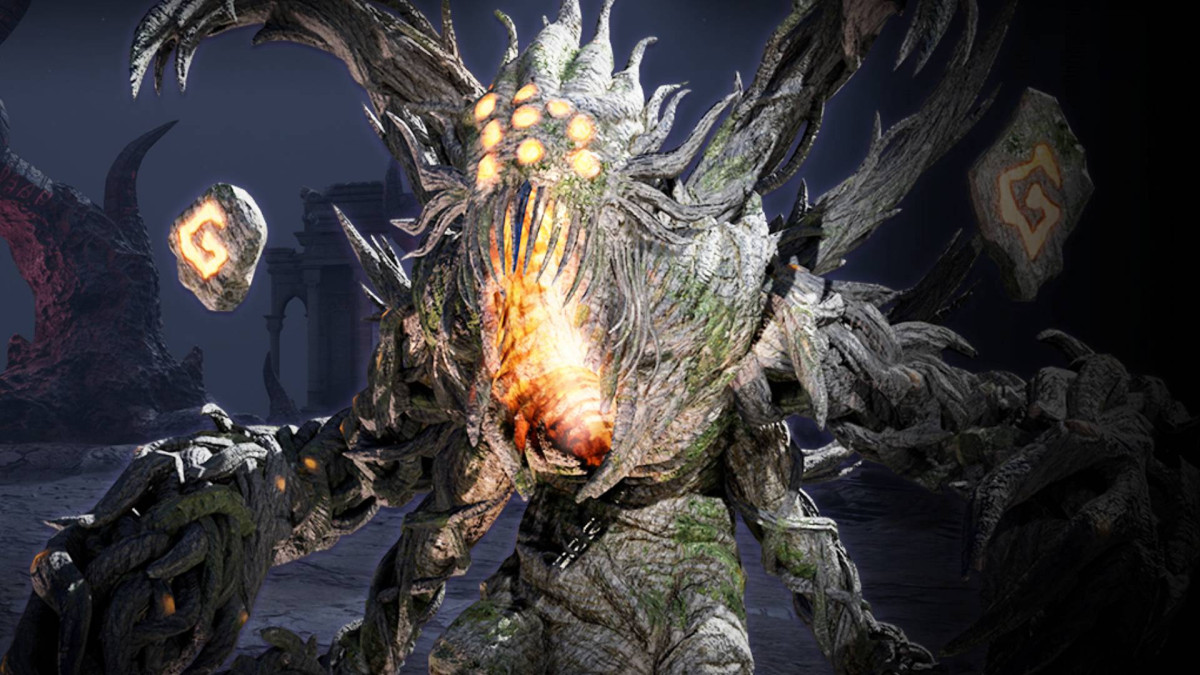
Voidwastes Final Boss – Shakarux
Shakarux is the final boss of the Voidwastes dungeon in Throne & Liberty. Before starting the fight, put pins on the six pillars around the edge of the room to make them easier to find during the battle. You should also split your group into three pairs, which you'll need for the Touch of Darkness mechanic mentioned below.
The mechanics of the boss are listed below:
- AOE shockwave – The boss hits the ground, sending out a yellow shockwave that damages everyone. This is a Fury attack, so you should block it to negate the damage.
- Touch of Darkness – Three purple lasers will aim towards the boss from crystals around the edge of the room. The lasers will gradually apply “Touch of Darkness” stacks to the boss. If the boss reaches 30 stacks, he will explode, dealing massive damage to your group and probably causing everyone to wipe. You should have a player blocking each laser at all times. The lasers will also give players stacks of “Touch of Darkness” and cause them to explode if they get to 30 stacks, killing them instantly. Utilize the pairings that you assigned at the start of the fight to deal with this mechanic. Each player has their number of stacks displayed above their head, so when you get close to 30, get out of the laser and let your buddy take over. Your stacks gradually diminish when you're not touching the laser, so be ready to take over from your friend again when they get too many stacks.
- Red Orb – The boss will curse a player with a red orb. If you see a red orb on your character, you must head to the arena's edge, away from other players. After a few seconds, the red orb will turn into a large black hole AOE that sucks players in. Taking this to the edge makes it much easier to avoid and takes up less space.
- Acid Pools – The boss drops some acid pools on the ground. Move away and avoid these until they disappear.
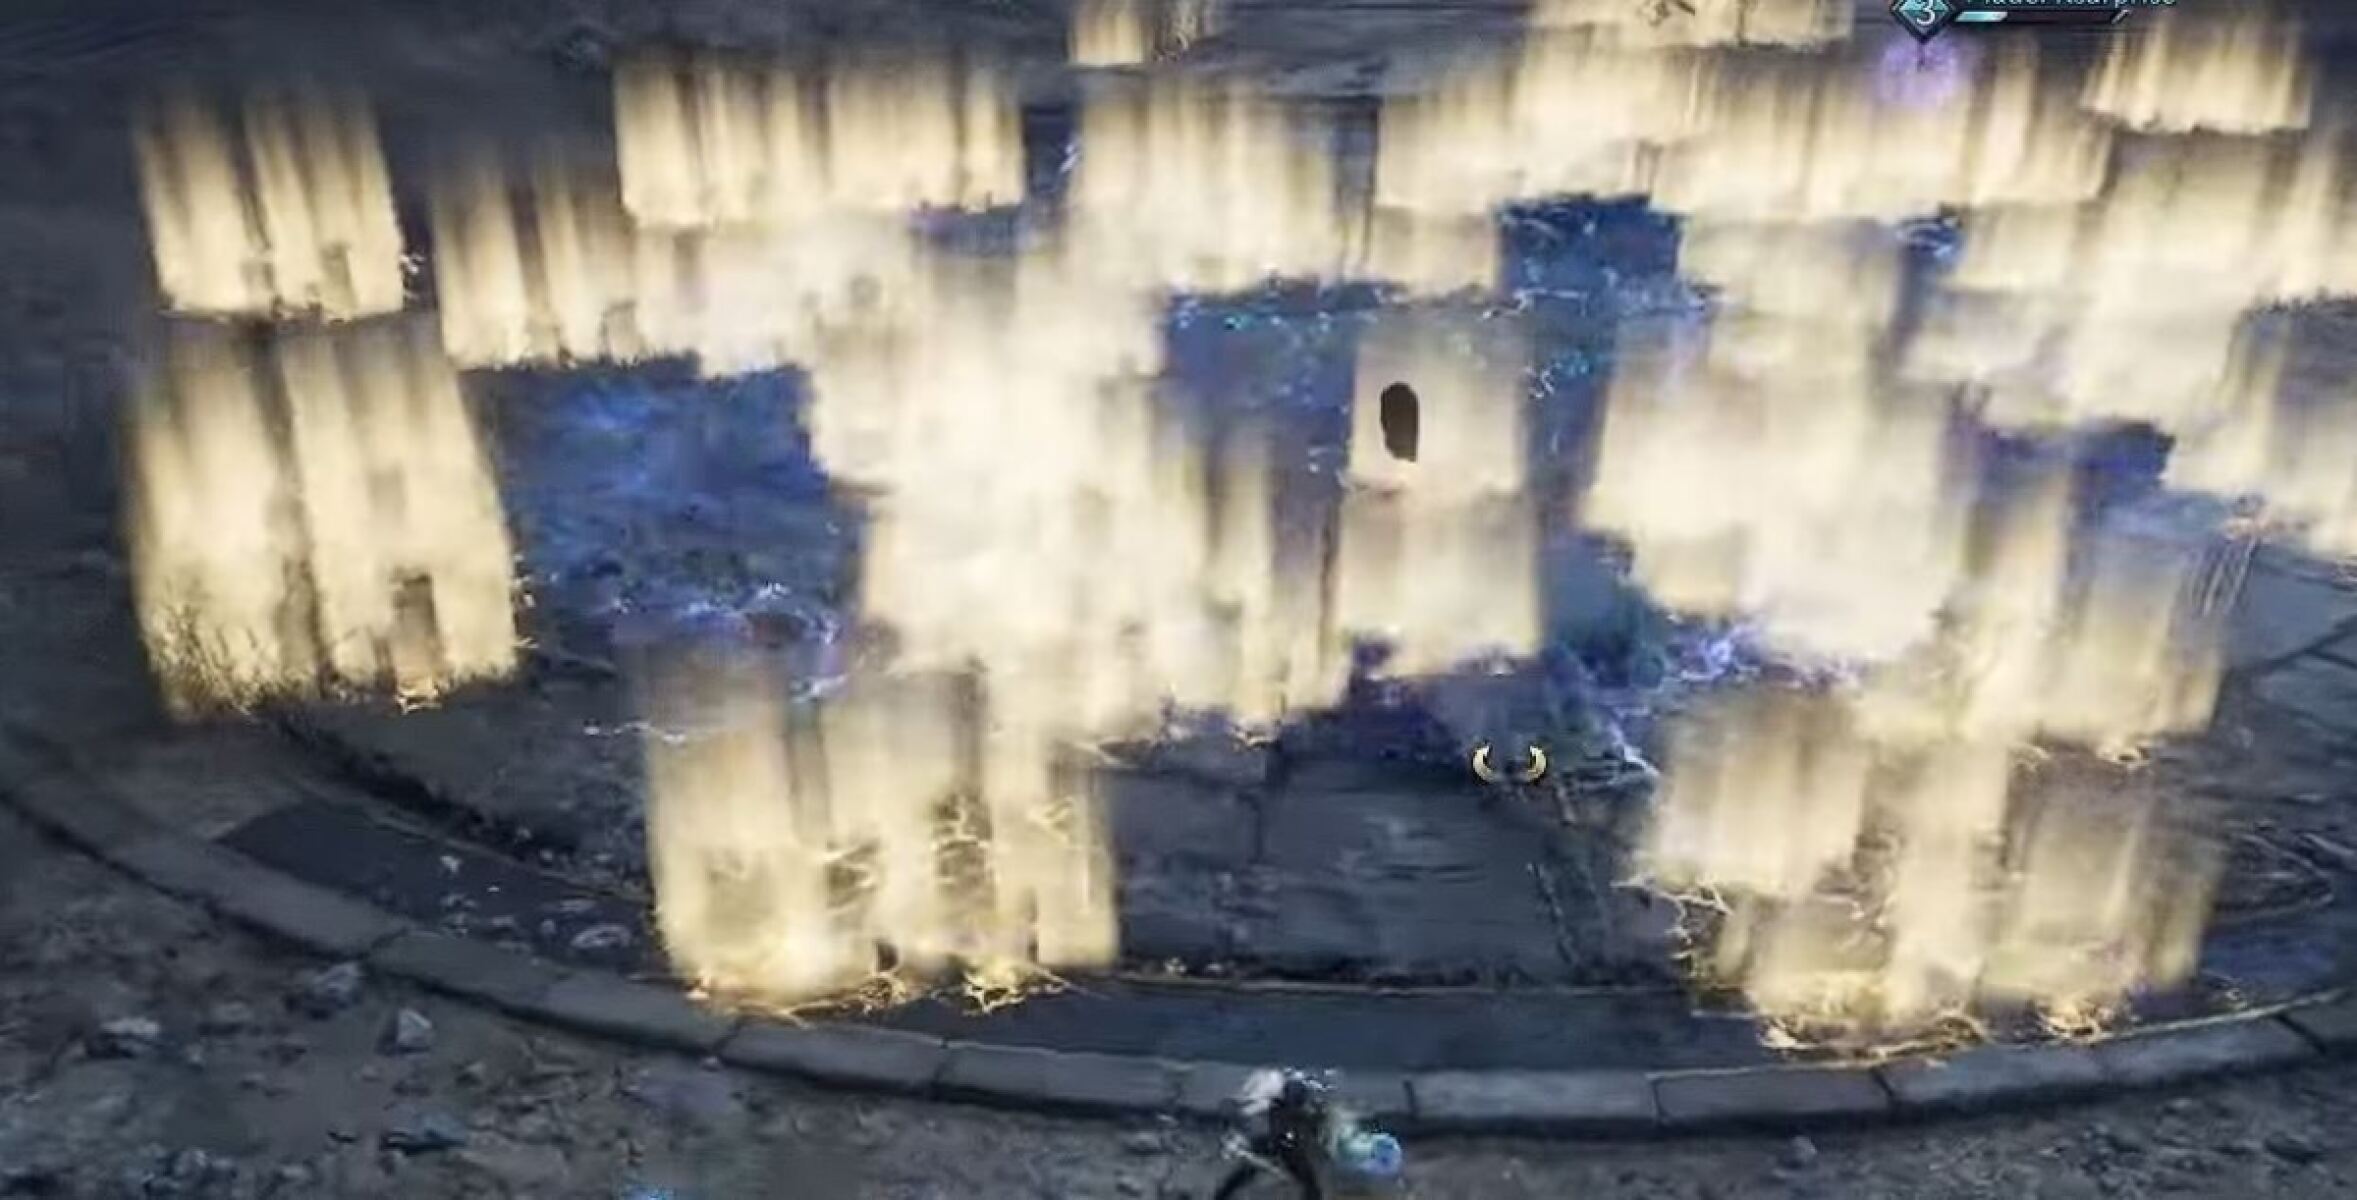
- Breath – The purple lasers will disappear, and a maze of yellow-brown vents appear on the ground. When this happens, players need to spread out evenly, taking care to avoid the vents. After a few seconds, five players will get a large circle around them. The boss will then begin a long, wide, breath attack that gradually rotates around the room. Your team needs to navigate the maze while ensuring that your circle doesn’t touch any other player. If the circles touch, you will both be stunned.
- Gold Orbs – The sixth player is marked with a golden orb and will not get a circle around them. This player effectively has aggro during this phase, and the boss will be chasing them with their breath attack. Three other golden orbs will appear on the dark pillars around the edges of the room. The player with the orb needs to run in the correct direction so that the boss rotates and breaths on all the golden orbs, destroying them. If this is not done, the golden orbs will explode, dealing around 6,000 damage each. If you miss one golden orb, it’s survivable, but missing two is very dangerous and missing all three is an almost certain wipe. The player with the golden orb shouldn’t worry too much about other players when doing this – it is everyone else’s job to ensure they avoid the breath, destroying the orbs is the most important thing. When you’re new, you should stop DPS during this mechanic and focus on surviving the mechanic. However, more experienced players can eventually start dealing damage when this happens.
- More Gold Orbs – The boss will curse all players with a golden orb. These orbs explode, dealing heavy damage (around 8,000). If everyone is healthy when this happens, then there shouldn’t be any deaths. Bunch up quickly afterwards so the healer can heal everyone.
- Low HP Enrage – At low HP, the boss will drop double red orbs, which can be dealt with in the same way as the single red orbs from earlier. Sometimes, he will do the gold orb explosion back to back, so the healer needs to heal everyone quickly whenever the gold orb mechanic occurs, just in case it gets repeated straight after.
We hope you liked this guide for the Voidwastes dungeon in Throne & Liberty.
About the Author: Andrew
