Temple of Slaughter Dungeon Guide - Throne & Liberty
Welcome to the Temple of Slaughter dungeon guide for Throne & Liberty. In this guide, we will provide you with a walkthrough of the Temple of Slaughter dungeon, including the mechanics of all mobs and bosses, as well as strategies and tips for beating the Temple of Slaughter.
The minimum level of the Temple of Slaughter is level 50, and it can be considered a harder version of the Roaring Temple. If you haven’t already, you might want to finish that dungeon before taking on the Temple of Slaughter, as some aspects of the two dungeons are quite similar.
For more guides about a variety of topics in TL, please check our Throne & Liberty Guides Database.
Temple of Slaughter Guide for Throne & Liberty
Below you can find a step-by-step guide for finishing the Temple of Slaughter in Throne & Liberty. All mechanics of bosses and other notable enemies are listed.
First Rooms
The first section of the dungeon is extremely similar to the first section of Roaring Temple. You must clear a couple of rooms of enemies, and then you find yourself in a larger room. Defeat the enemies in this room, activating all of the Mana Flood Regulators as you go. The room will gradually flood with water, carrying you up to the top level, where you can find the first boss of the Temple of Slaughter.
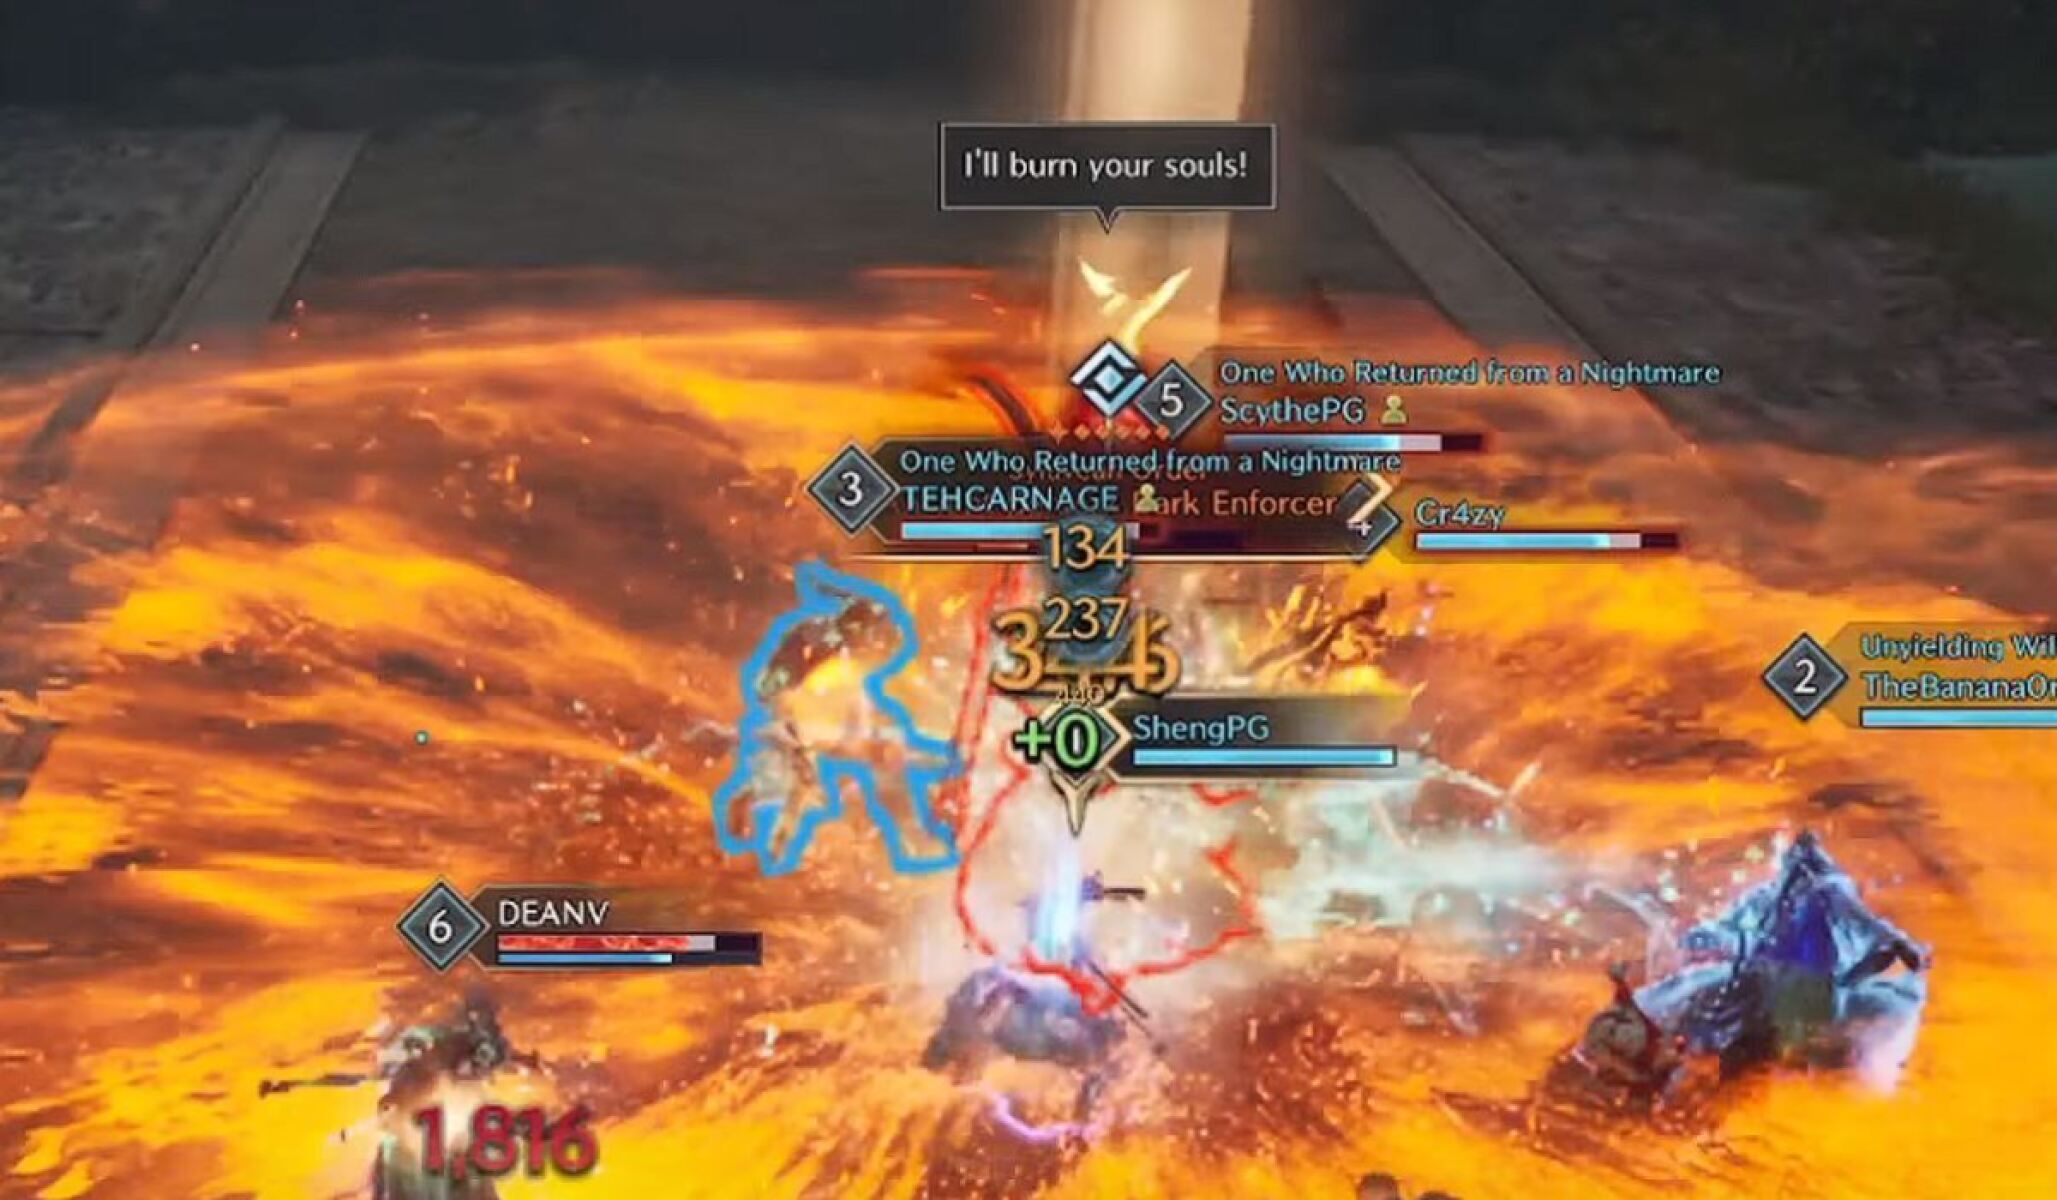
First Boss – Berserk Dark Enforcer
The Dark Enforcer is a beefed-up version of the first boss from the Roaring Temple. He has standard attacks, which the tank should be able to handle with help from the healer if necessary.
The boss will fill the room with fire periodically, applying Burning stacks to players. If you are taking too much damage from the Burning effect, you can jump in the water to cool off.
Burning Corridor
Just like in Roaring Temple, after the first boss, you will come to a long room with a sheer drop in front of you, and you will see fire below. The easiest way to proceed here is to use your morph to glide to the other side of this room, but take care to avoid the fire pillars.
You will then need to defeat some more basic mobs, and after that you can proceed to the next boss.
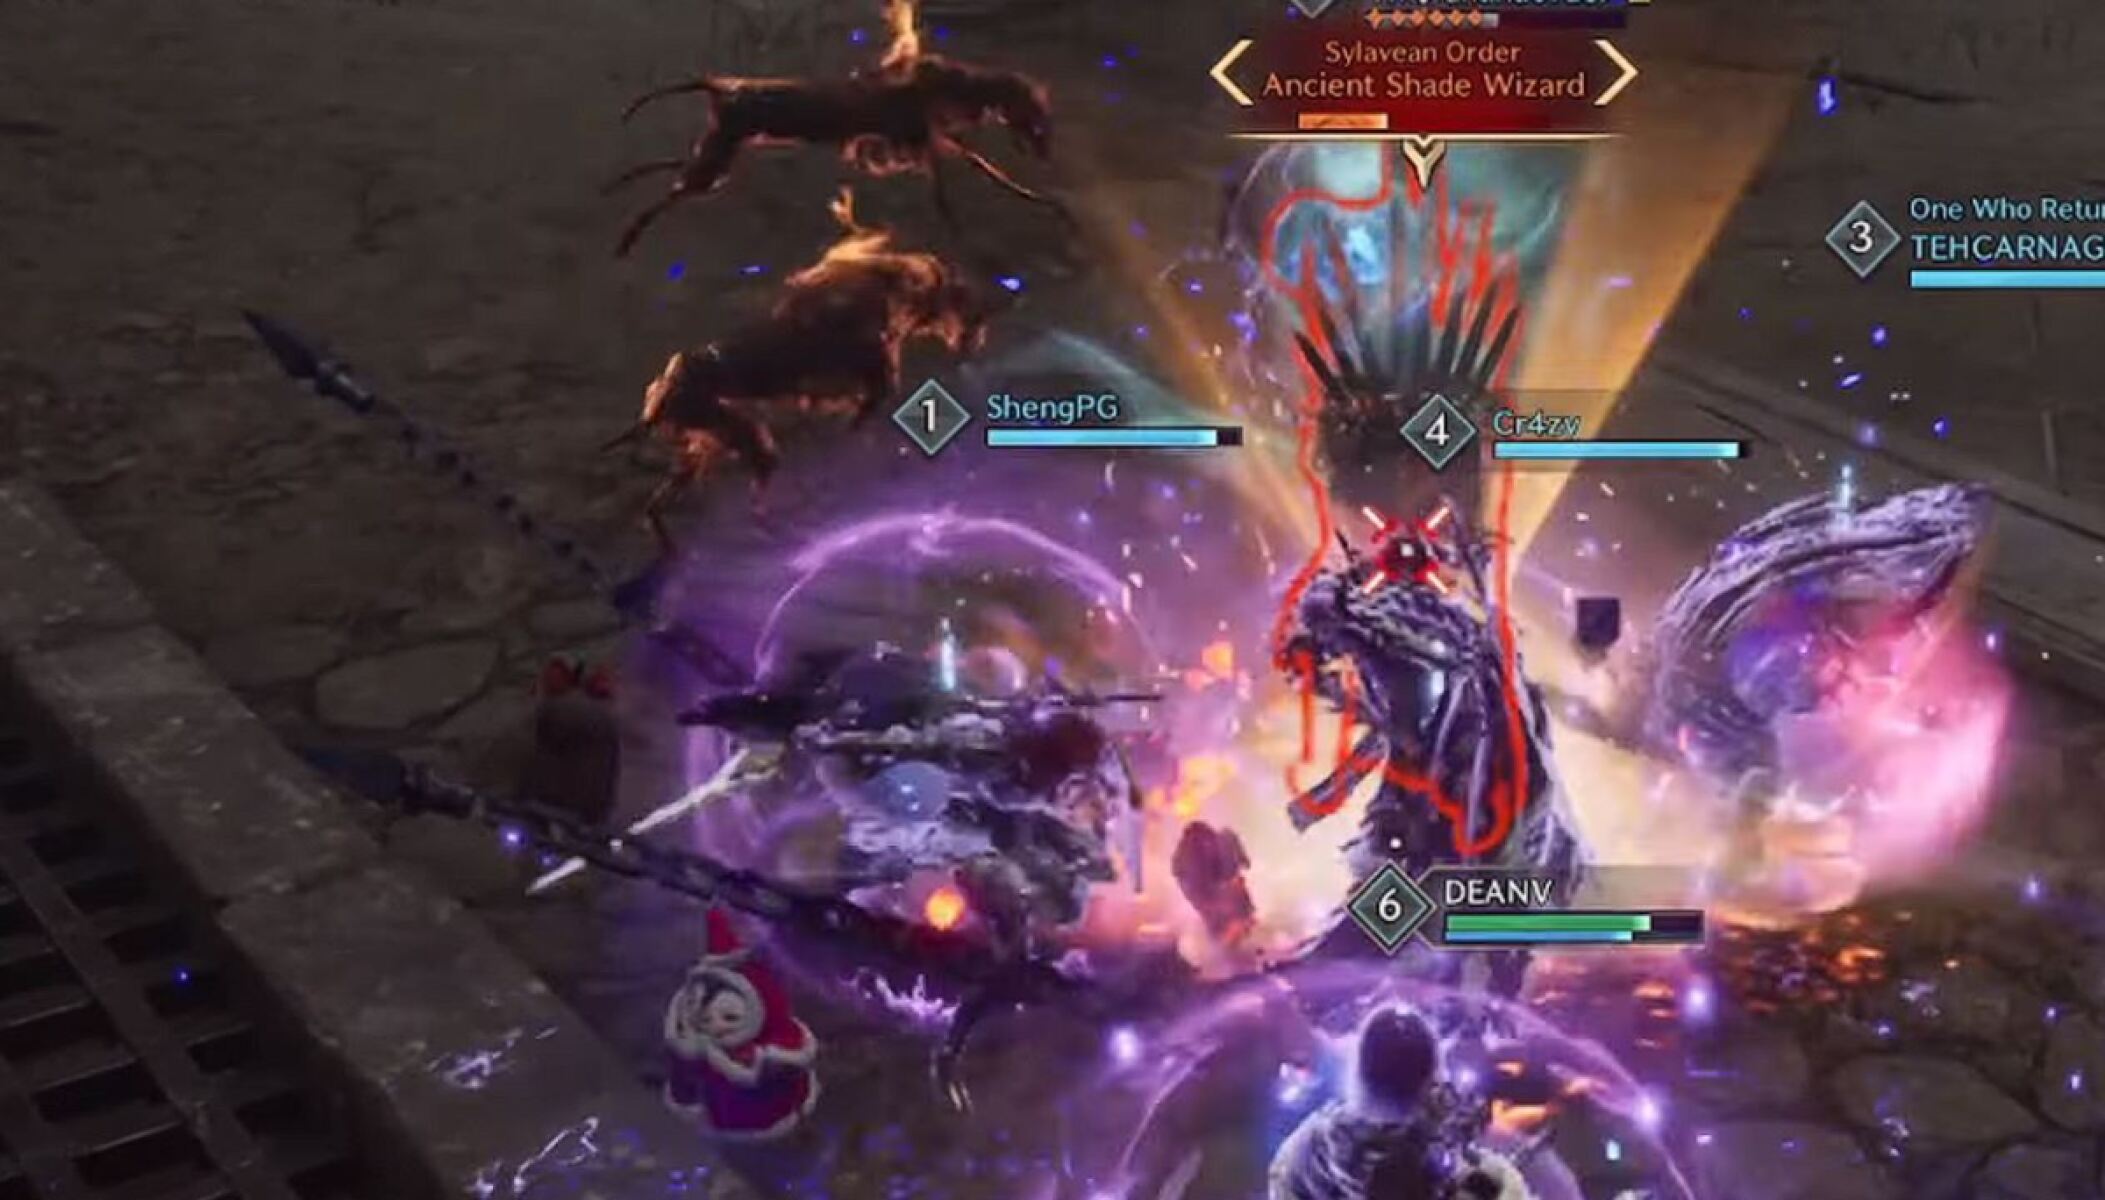
Second Boss – Shade Wizard
The Shade Wizard boss is very similar to the version of the boss found in the Roaring Temple.
The boss has just a couple of mechanics:
- Zombie Dogs - The Shade Wizard spawns exploding dogs into the fight, which will chase players around and eventually explode. Look out for the exploding dogs, and if you are being chased, then make sure to kite it away from the group. The explosion is a Fury Attack - block it with good timing to mitigate the damage and the stun.
- Fury Attacks & Poison - The boss shouts a taunt then does a Fury Attack which needs to be blocked. He will then shoot poison at players, leaving an AoE which you should avoid. He then does a second Fury Attack, similar to the first one. It is possible to stun the boss after he shouts his taunt to prevent these attacks from happening.
Note that more exploding dogs will spawn here compared to the easier Roaring Temple version of the boss.
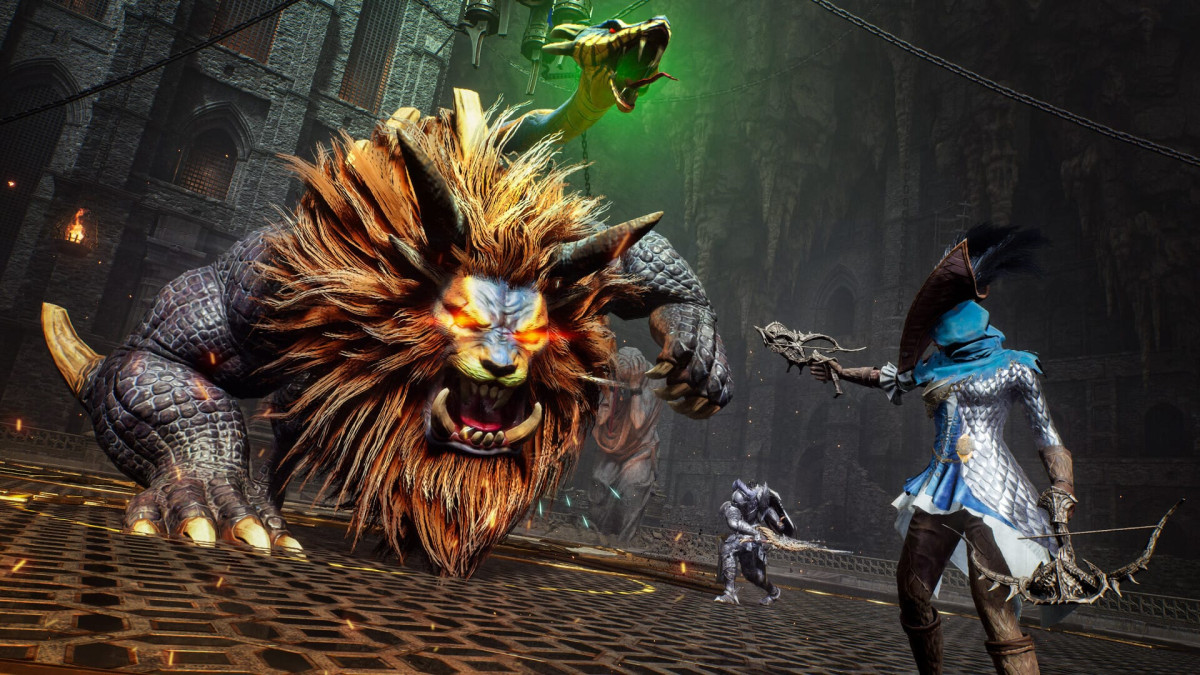
Final Boss – Rex Chimaerus
Rex Chimaerus is the final boss of the Temple of Slaughter in Throne & Liberty. This boss inherits many mechanics from the final boss of the Roaring Temple. However, this time, a couple of things have changed to make the fight more difficult.
All mechanics of the Rex Chimaerus boss are listed below.
- Jump Attack – The boss performs a jumping attack against the player with aggro – this should be the tank.
- Poison Puddles – The boss shoots poison at players, leaving AOEs on the ground when it lands. Avoid these so you don’t take damage.
- Tail Swipe – Rex Chimaerus will swipe its tail at any players who stand too close behind it.
- Paralytic Venom – Rex Chimaerus targets a player with a paralytic venom. The afflicted player can clearly see that they have the debuff, as there will be a green pillar emanating from their character. This player needs to run away from the boss towards the edge of the arena, and ideally behind the tank. They have a few seconds to do this before the venom takes effect. The boss will then shoot three fireballs at the paralysed player, which will probably kill them if they hit. The tank needs to block these fireballs by standing in between the boss and the paralysed player. If the tank is well-geared and supported by a watchful healer, they should be able to tank all 3 fireballs. If not, another player can help by taking one of them. The paralysed player takes double damage and will explode if killed, so it's vital that none of the fireballs hit them!
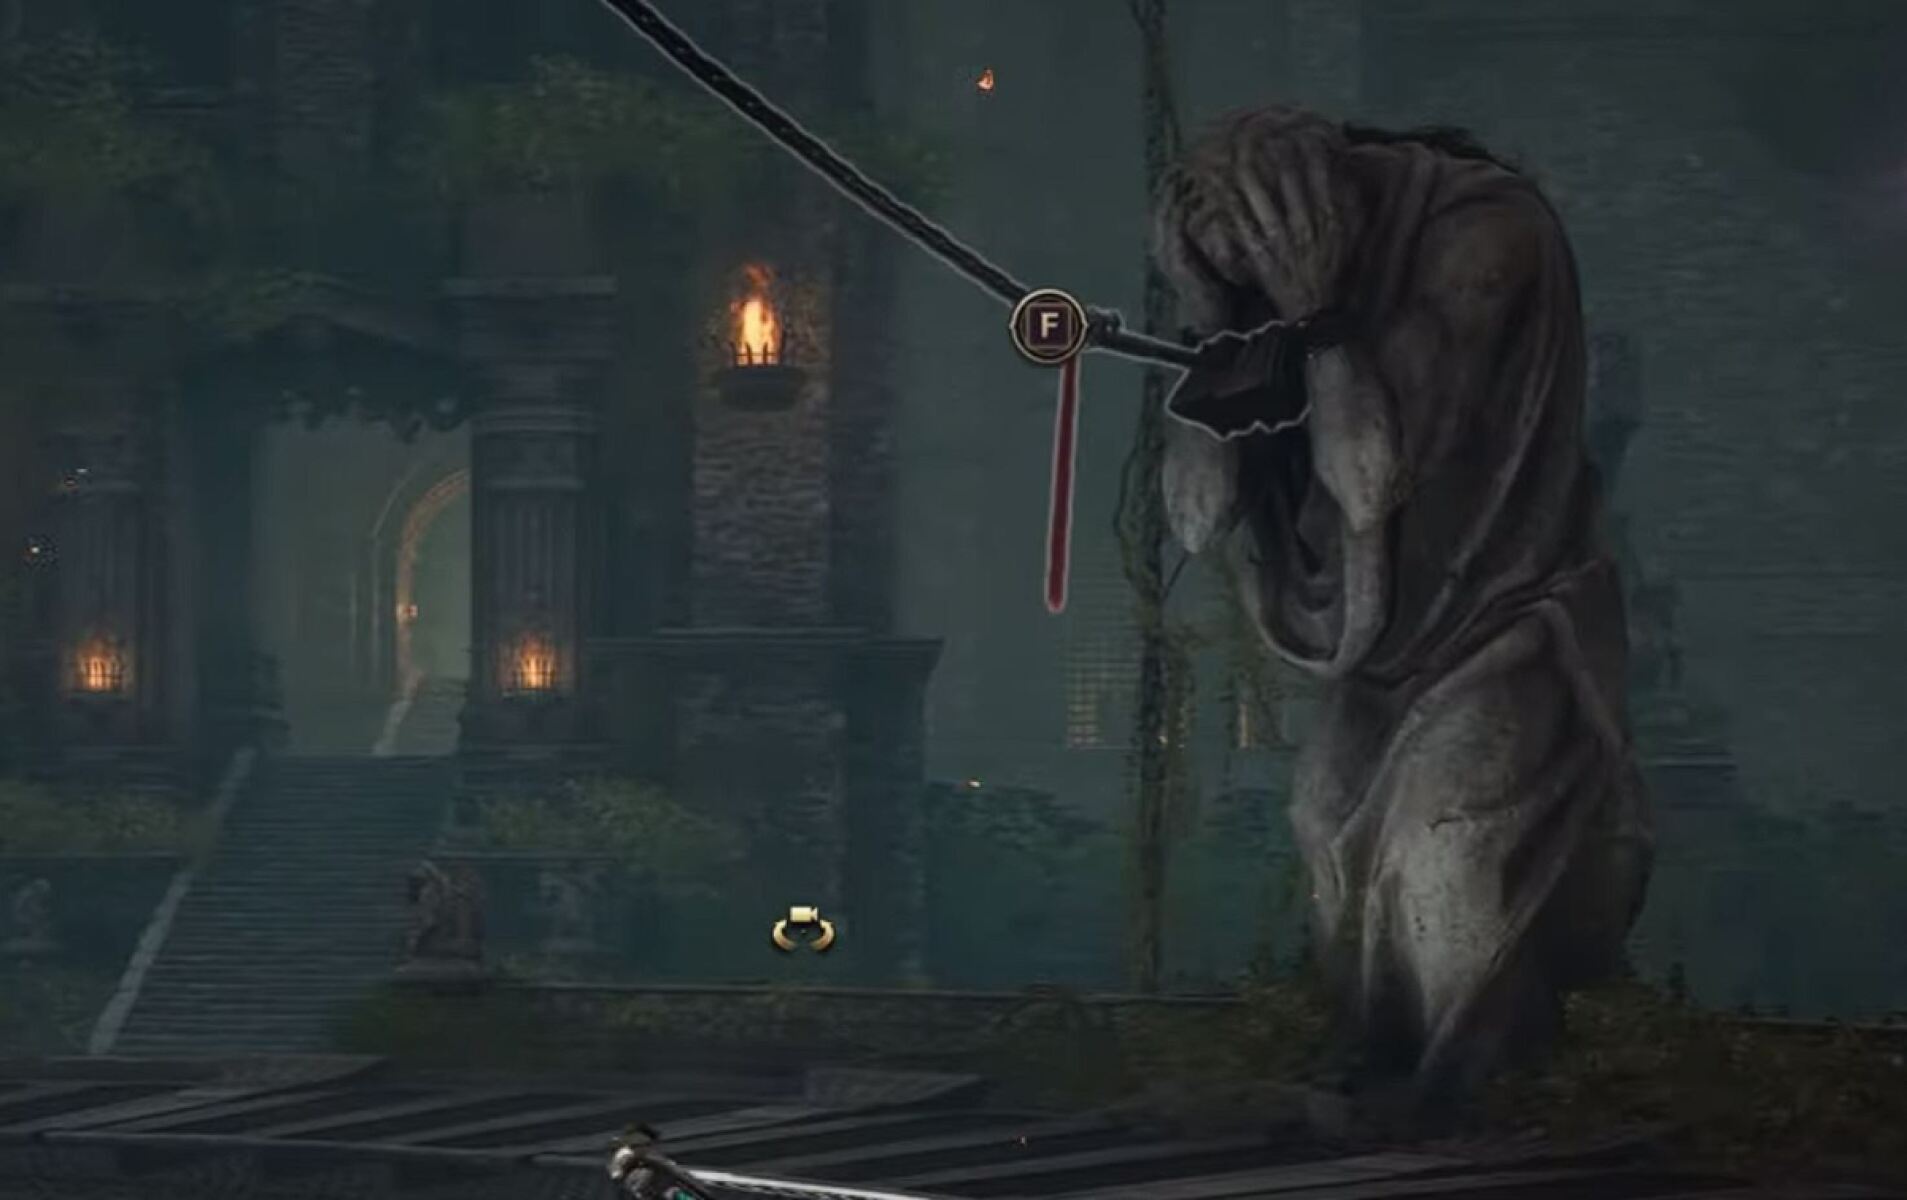
- Fire Wave – The Rex Chimaerus will go to the middle of the room and begin charging up a fire wave that will wipe the group. You can stop this by pulling four chains around the arena, but unlike the Roaring Temple, these chains are not immediately accessible. Someone needs to grapple upwards using the floating pitons, and then land on top of the middle platform. They can then pull a lever to unlock the four chains around the arena's edge. All four chains need to be activated at the same time (assign players to do this), dousing the boss with water to stop the fire wave. The boss will be briefly stunned, allowing everyone to focus on dealing damage without worrying about anything else.
These mechanics will repeat until the boss dies.
We hope you liked this guide for the Temple of Slaughter dungeon in Throne & Liberty.
About the Author: Andrew
