Table of Contents
Introduction
Equipment Setups
Equipment
- Heavy Attack Chance
- Hit Chance
- Max Health
Show Runes
-
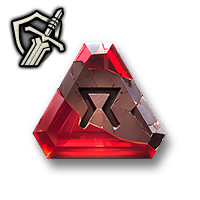 Rare Attack RuneHeavy Attack Chance
 -
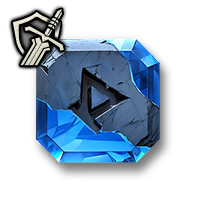 Rare Defense RuneMelee Endurance
 -
 Rare Chaos RuneMelee Heavy Attack Chance
- Heavy Attack Chance
- Hit Chance
- Critical Hit Chance
Show Runes
-
 Rare Defense RuneMagic Endurance
 -
 Rare Attack RuneHeavy Attack Chance
 -
 Rare Support RuneSkill Damage Resistance
- Buff Duration
- Max Health
- Skill Damage Boost
Show Runes
-
 Rare Attack RuneCritical Hit Chance
 -
 Rare Defense RuneMax Health
 -
 Rare Support RuneCollision Resistance
Stat Points


Setup Guide
T1 Blue and Purple
You do not need all purple equipment to reach a high combat power. Some players go for full purple, disregarding blue. This approach takes forever and gets you nowhere. Think about the purple traits and their costs. Blue offers the better route to take. Farming proves easier, and blue remains less expensive in terms of traits.
Once you have your blue gear with all traits maxed out, you start to farm purple.
No Arch and World Bosses
This build does not require any Arch and World Boss gear.
No Guild but...
As a casual player, I prefer to avoid guild involvement. In most cases, joining a guild comes with duties. You must stay online daily or complete guild tasks by 18:00 the following day. And what about loot distribution? How fair remains loot distribution with up to 70 players in a guild?
Guilds with 5 to 10 players make more sense. I started a solo guild to get minor buffs like Defense and Mana Regen.
Why Endurance and Not Evasion?
Andrew provides an excellent explanation for the reasons.
https://throneandliberty.gameslantern.com/guide/tl-evasion-vs-endurance-which-is-better
https://alcasthq.com/tl-all-stats-guide/
One-Star Co-Op Dungeons
I recommend starting One-Star Co-Op Dungeons when you reach combat power 3'100. With a combat power of only 1'600, entering the dungeon could lead to a rough encounter with the boss.
Ranking the One-Star Co-Op Dungeons from Easiest to Hardest
- Cave of Destruction
- Death's Abyss
- Butcher's Canyon
- Temple of Slaughter
- Tyrant's Isle
- Cursed Wasteland
Equipment
- Heavy Attack Chance
- Hit Chance
- Max Health
Show Runes
-
 Rare Attack RuneHeavy Attack Chance
 -
 Rare Defense RuneMelee Endurance
 -
 Rare Chaos RuneMelee Heavy Attack Chance
- Heavy Attack Chance
- Hit Chance
- Critical Hit Chance
Show Runes
-
 Rare Defense RuneMagic Endurance
 -
 Rare Attack RuneHeavy Attack Chance
 -
 Rare Support RuneSkill Damage Resistance
- Buff Duration
- Max Health
- Skill Damage Boost
Show Runes
-
 Rare Attack RuneHit Chance
 -
 Rare Defense RuneMax Health
 -
 Rare Support RuneCollision Resistance
- Debuff Duration
- Max Health
- Skill Damage Resistance
Show Runes
-
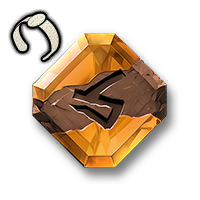 Rare Support RuneSkill Damage Resistance
 -
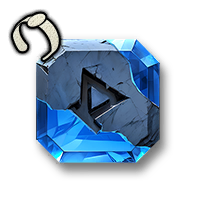 Rare Defense RuneMax Health
 -
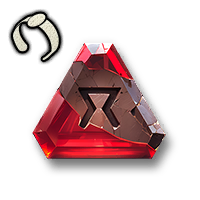 Rare Attack RuneHeavy Attack Chance
- Buff Duration
- Max Health
- Skill Damage Boost
Show Runes
-
 Rare Attack RuneCritical Hit Chance
 -
 Rare Defense RuneMax Health
 -
 Rare Support RuneCollision Resistance
- Buff Duration
- Max Health
- Skill Damage Boost
Show Runes
-
 Rare Attack RuneMelee Critical Hit Chance
 -
 Rare Defense RuneMax Health
 -
 Rare Support RuneCollision Resistance
- Debuff Duration
- Max Health
- Skill Damage Resistance
Show Runes
-
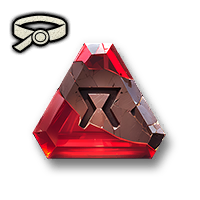 Rare Attack RuneHit Chance
 -
 Rare Support RuneSkill Damage Resistance
 -
 Rare Defense RuneMax Health
Stat Points


Setup Guide
T1 Full Purple
Before going full purple, max out the traits on your blue gear. With a solid combat power, farming purple gets easier.
No Arch and World Boss Loot
This build does not require any Arch and World Boss loot. You farm the gear in open-world and co-op dungeons.
Two-Star Co-Op Dungeons
I suggest tackling Two-Star Co-Op Dungeons once your combat power hits 4'000. Attempting the dungeon with only 2'500 combat power might result in a tough fight against the boss.
Ranking the Two-Star Co-Op Dungeons from Easiest to Hardest
- Valley of Slaughter
- Voidwastes
- Island of Terror
- Carmine Rage Island
- Torture Chamber of Screams
Skill Setups
Skills
Setup Guide
Solo Rota
I start my rotation with Annihilation Blade, Piercing Strike, Touch of Despair, Annihilating Slash, and Counter Barrier. When the mob has three stacks of Touch of Despair, I use Time for Punishment. Then I cast Decaying Touch, followed by Curse Explosion. The other skills I employ when needed.
With the Shield Survival Technique, I block any Fury Attack.
Skills
Setup Guide
Party Rota
I start my rotation with Provoking Roar, Piercing Strike, Touch of Despair, Annihilating Slash, Counter Barrier, and Time for Punishment.
Controlling Rake pulls mobs to me. With Strategic Rush, I push mobs against walls and stun them (Death's Abyss) or off bridges (Butcher's Canyon). Stalwart Bastion protects the party in dire situations. Blessed Barrier and Fountain of Life, I use to save myself.
With the Shield Survival Technique, I block any Fury Attack.
Skills
Setup Guide
Temple of Slaughter
Clay's Salvation's Weaken Removal cleanses one firedebuff. I can tank all three fireballs. To pull this off, you have to think and act quickly.
After the Fury Attack of Rex, I get into position whilst casting Stalwart Bastion. I stand as close as possible to Rex to block all three fireballs. Afterwards, I cast Clay's Salvation and maybe Fountain of Life.
If the paralysed player stands too close to Rex, the AOE blast could kill me and the player. Before I jump in, I assess the situation.
Weapon Specialization
Skills
Sword & Shield
Wand & Tome
Artifacts
Guide
How to Get Each Piece of Equipment
The "outdoors" drop rate proves abysmal. I farmed Mitrans for hours, but the Handguards of the Resistance never dropped. However, after farming Ork Spearmasters for three hours, I got the Warlord's Shroud. Killing Living Armor Foot Soldiers in Syleus's Abyss 3F-4F got me Warlord's Shroud in only one hour. "Indoors"'s drop rate surpasses the "outdoors" drop rate.
Getting any gear from Syleus's Abyss 5F-6F, excluding Demonhoof Head Shaman, should not take too long. After about four hours, I got all the gear from 5F-6F, excluding Shock Commander Plate Armor.
The drop rate in co-op dungeons varies significantly. King Chimaerus dropped the Regeneration Loop in the first run. In comparison, Karnix dropped Karnix's Netherblade after 28 runs.
T1 Blue and Purple
Codex Adventure
Chapter 6: The Song of the Vienta Dwarves
Chapter 7: The Sandstorm Overlord
Lithograph Book
Elemental Bracelets
Hawk's Eye
Solo Farming
Akidu Valley
Orc Spearmaster
Daybreak Shore
Iron Chestacean
Purelight Hill
Contaminated Mitran and Mitran
Syleus's Abyss 3F-4F
Living Armor Foot Soldier
Random Party Farming (once you reach combat power 3'000, you can farm Syleus's Abyss 5F-6F solo)
Syleus's Abyss 5F-6F
Demonhoof Head Shaman
Demonhoof Butcher
Demonhoof Tracker
Lethal Venom Abomination
Steelclaw Abomination
Saurodoma Island
Reptilian Lancer
Co-Op Dungeons
Roaring Temple
King Chimaerus
One-Star Co-Op Dungeons
Death's Abyss
Butcher's Canyon
Duke Magna
Tyrant's Isle
Toublek
T1 Full Purple
Random Party Farming (once you reach combat power 3'000, you can farm Syleus's Abyss 5F-6F solo)
Syleus's Abyss 5F-6F
Demonhoof Head Shaman
Demonhoof Butcher
Demonhoof Tracker
Steelclaw Abomination
Saurodoma Island
Reptilian Soldier
One-Star Co-Op Dungeons
Cave of Destruction
Dimensional Essence: Salvation
Two-Star Co-Op Dungeons
Island of Terror
Voidwastes
Shakarux
Valley of Slaughter
Carmine Rage Island
Gaitan
Torture Chamber of Screams
Kaligras

